

Welsh bara brith teabread.
 Continuing on a culinary exploration of Wales through the pages of Best of Traditional Welsh Cooking ...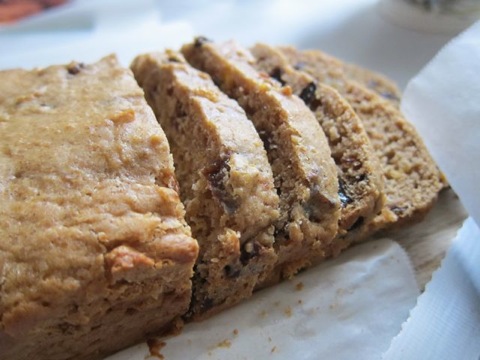
While I am eager to try dishes like “Anglesey eggs” and “Cockle cakes” (still trying to figure out where I can buy cockles in these parts), I’m sort of stuck in the “Breads, cakes & pancakes” section. I am hopelessly weak when it comes to flour-based food, especially yeast and grainy bread, and bready things like scones, cakes, and rolls.

My first choice of bread is always a homemade bread sliced thickly, toasted and slathered with butter and preserves, or topped with ham and cheese. But I do love sweets! And this Welsh both bread and sweet.
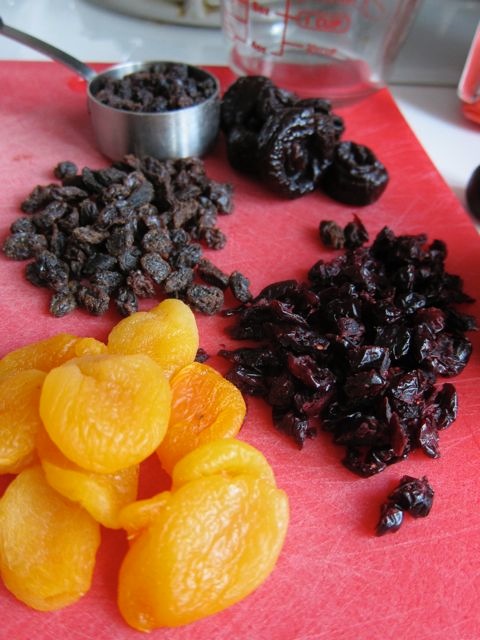
Bara (“bread”) brith (“speckled”) is a yeast-raised fruit bread, and bara brith teabread is its quick baking-powder counterpart. Full of tea-plumped raisins, currants and other dried fruits, it is speckled, indeed. The recipes I have for bara brith, and its Irish cousin brack (from the Gaelic “brec” for “speckled”), also call for candied peel, which has limited (read: NO) appeal in my house, so I leave it out.

With just a little advanced prep — the fruit needs to plump and soak up strongly brewed tea for a few hours or overnight — this bread is easily mixed and baked. Most recipes call for raisins, sultanas and currants which. Since that amounts to three kinds of raisins, I like to throw in a bit more variety.

In addition to raisins and currants, I used chopped apricots, craisins and orange-scented prunes. You could also add variety with flavored tea, such as peppery Earl Grey or bergamot-scented Lady Grey. I used Bigelow's Constant Comment, with its distinctive fragrance of orange and clove.

My favorite part of this recipe comes from its description in the book: “It is meant to be sliced and buttered, but it also tastes good just as it is.” There ... it was meant to be buttered! I love butter, and will someday write an Ode to Butter. In my world it is a food group unto itself.

Bara brith teabread wears a few generous smears of butter quite well, but is truly delicious as is — moist, sweet, and you really can taste tea in the fruit. I also find that sweet breads (not sweetbreads!) are taste-tea topped with cold spreadable cream cheese. Remember those cans of Boston Brown Bread? We smothered rounds of it with cream cheese. And odd as it sounds, try topping bara brith with slices of mild cheddar or monterey jack. It goes, I promise.

Once the bread is cooled you can slice and store it in a heavy duty resealable bag in the freezer. Then just pull off a few slices at a time and defrost on the counter, in a microwave or toaster oven. Serve up with nice hot tea. And don't forget the butter!

* * * * * * * * * *
Welsh Bara Brith
From "Best of Traditional Welsh Cooking"
1-1/3 cups mixed dried fruit (including chopped mixed candied peel, optional)
1 cup hot strong tea, strained
2 cups self-rising flour OR 2 cups regular flour plus 1 Tablespoon baking powder and 1/2 teaspoon salt
1 teaspoon mixed spice, such as apple or pumpkin pie spice
2 Tablespoons butter, chilled
1/2 cup light brown sugar
1 egg, lightly beaten
Put dried fruit into a heatproof bowl and pour hot tea over. Stir a few times, then cover and leave to stand at room temperature several hours or overnight. When you are ready to assemble batter, preheat the oven to 350 degrees Fahrenheit. Grease a large loaf pan and line it with baking parchment.
Sift the flour and mixed spice into a large mixing bowl. Add the butter and rub it into the flour with fingertips, a pastry blender, or two knives until mixture resembles fine breadcrumbs. Stir in the sugar, then add the fruit with its liquid, and the beaten egg. Stir well until very soft in consistency.
Spoon mixture into the prepared loaf pan and level the surface with a rubber spatula. Bake for about 1 hour or until a skewer inserted into the center comes out clean. Remove from pan and place on rack until completely cool. Slice, butter, eat. (I don't think you needed me to tell you that.)
Welsh Rabbit.
I remember from my childhood the mysterious appearance of frozen Welsh Rarebit in our family’s freezer. I was so curious about this thing called “rarebit” — apparently cheese melted on toast — and yet I don’t remember my parents ever serving it. Who knows, maybe they were saving it all for themselves! There were 12 of us in total and food disappeared quickly. Perhaps it was a treat for them to savor together in the rare moment when no children were around.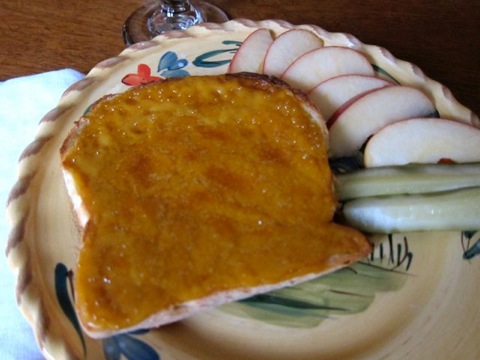
Had they only known how easy and downright cheap Welsh rabbit can be, they might have served it up more often, especially on meatless Fridays that we sort of adopted as semi-practicing Catholics. (Those Fridays morphed into “Every Man for Himself” which meant “Mom Needs a Break from Cooking Oh For Heavens Sake You Won’t Starve Pour Yourself a Bowl of Cereal or Make Some Toast.”)
Most books, articles, blogs and cooking sites I consulted seem to agree that caws pobi — Welsh for “toasted/roasted cheese” (any Welshfolk out there are welcome to correct me on that) — originated as rabbit not rarebit, one possible explanation being that Welshmen were too poor to afford even lowly rabbit meat so they frequently relied on cheese for tummy-filling sustenance. And if you mixed a little beer or stout with that cheese, well you probably earned it.

I found no less than six recipes for rabbit/rarebit among my various cookbooks. Heck, even Better Homes & Gardens book has “Welsh Rarebit Breakfast” — served a la Eggs Benedict atop english muffins and Canadian bacon — and a “Beer Rarebit” variation served with bacon, in case the cheese and eggs didn’t help you meet the minimum daily requirement of fat and cholesterol.
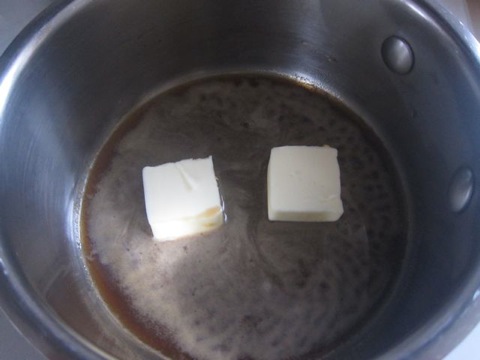
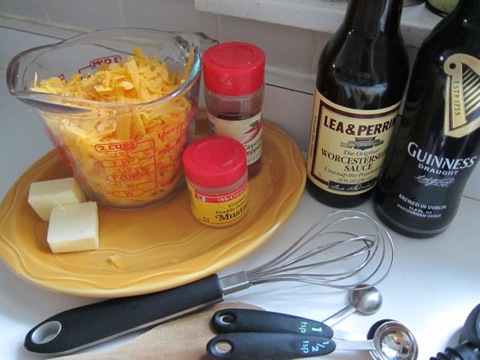
Recipes vary little from one to the next: usually butter, mustard, cayenne, Worcestershire sauce, grated cheese and milk or beer. Some list eggs or yolks in the ingredients, but I took a pass on that. I just wanted cheese and beer! A few call for mixing the ingredients cold and spreading them on bread before toasting; most melt all ingredients in a saucepan first and then pour or spoon it over bread or toast. Enjoy the cheese covered bread/toast immediately or pop it under the broiler until brown and bubbly. Add a poached egg and it turns into Bucks Rabbit. A versatile dish, indeed!

For me, really good quality and sturdy bread is a must for this one. Two of my top store-bought choices are Breadsmith’s Honey White and Rustic Italian. Thickly cut homemade bread would be heavenly! Multi-grain or wheaten bread would be excellent too. Is it okay to recommend Irish wheaten bread for a Welsh dish? 'Cuz McNamee's is tasty and would be outstanding with beer-spiked cheese on top.
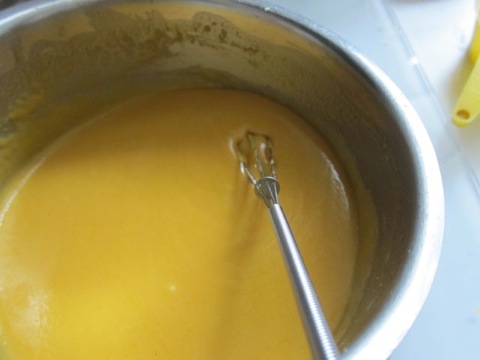
Heat the beer or milk in a saucepan with the butter, stir in the grated cheese (I used aged Wisconsin cheddar; some W. rabbit lovers around the internets recommend Welsh caerphilly cheese) until it melts, add the remaining seasonings and you have a savory sauce that is equally good for dipping chunks of bread into as it is for pouring over toast. If you can keep from slurping down spoonfuls of it before completing the rabbit roasting, I salute you! I couldn't.
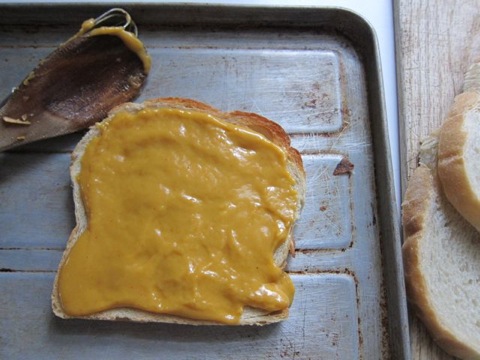
I hesitate to point out how cheap and easy this dish is, but there you go — it’s cheap and easy. And most of you probably have all these ingredients on hand right now. For the record, I used Guinness Stout in the sauce and served it up on the side as well. Irish beer with Welsh rabbit on Italian bread, with Gala apples and Kosher garlic pickles. I'm getting weak.
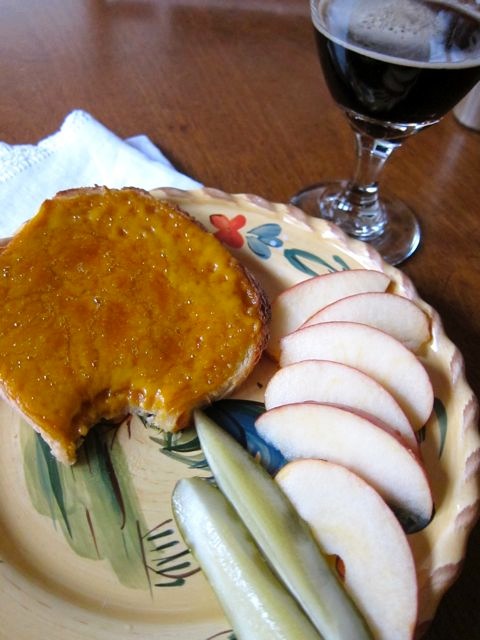
How many servings the recipe below yields is debatable. I could eat it all afternoon, so four slices of toasted Welsh rabbit for me technically equals one serving. But in a reasonable world, 1-2 slices should suffice per person. And can you see the opportunity for experimentation here? Try different cheeses or beer, Dijon or other mustards to alter the taste. Make it mild or spicy, use white or grainy bread. There may be more than one way to skin a rabbit, but in my cookbook it's much more appetizing to think of the many ways to make, and eat, Welsh Rabbit. So off I go.
Iyechid da! (Yeh-chid dah = Cheers! in Welsh)
* * * * * * * * * *
Welsh Rabbit (say rarebit if you must)
3 Tablespoons beer (I opted for Guinness Stout — use something really flavorful)
1 teaspoon powdered yellow mustard
2 Tablespoons butter
1 teaspoon Worcestershire sauce (more or less, to taste)
1-1/2 to 2 cups grated sharp cheddar cheese (about 6 ounces)
Dash cayenne pepper (optional)
4 slices bread
Whisk mustard powder into the beer. Pour into a small heavy saucepan, add the butter and Worcestershire sauce, and cook gently over medium heat until butter has melted.
Add cheese to hot beer and stir until melted, taking care not to let the mixture boil. Once smooth, taste and adjust seasonings; add cayenne if desired. Remove from heat and allow to cool slightly.
Lightly toast bread on both sides. Spoon or pour cheese sauce over toast and broil in a toaster oven or under flame just until bubbling and golden brown. Serve immediately.
Have a heart.

This I believe: that Valentine’s Day is not exclusively for lovers, and does not require champagne, slinky French lingerie or sparkly googaws from generic commercial jewelers. It is a day to tell family, friends, children, and even your pets how absolutely awesomely wonderful they are. Yes yes, you should be telling them on the other 364 days as well, but on Valentine’s Day you can do it with with foofy hearts, doilies, silly cards, little gifties and heart-shaped everything!

I’ve always given my son Valentine’s Day cards (obviously not ones that say “You’re making me horny”), as well as my parents and my very best friend.

Even if I didn’t have a lovin’ husband to get googly-eyed with on V-day, I’d still break out the heart-shaped chocolates and buy myself a bunch of tulips. Yes, I really would—no matter what my relationship status, I've never neglected myself on Valentine's Day. And when I was single and childless, I put up a fresh, fully decorated Christmas tree in my little studio apartment every year. I declare that Christmas is not only for children, as Valentine’s Day is not strictly for lovers!

I think I get why people go all anti-Valentine’s Day, but as a person who loves red and pink, lace, hearts, roses, chocolate, cupids, vintage Valentines, heart shaped cake pans/cookie cutters/candy/ornaments/boxes/earrings/picture frames/charms/baskets/dessert bowls etc., I refuse to miss out. And why should our kids miss out too? Instead of escaping from them—as divorced-remarried people, we get more than enough time away from our kids when they’re with the other parents—we have a family Valentine’s dinner at home.
This year it was nothing fancy (not like last year, with fillet mignon we scored on sale)—just soup and grilled cheese sandwiches, candy conversation hearts scattered across the table, candles, and beautiful deep pink roses from my One and Only. The fancyness was dessert: Chocolate Glazed Chocolate Velvet Cake hearts topped with pink frosting carnations and roses and pink ice cream.

The recipe for this almost-flourless chocolate cake—which I clipped from Redbook magazine in 1985—is easy, calls for only 5 ingredients, and requires the most basic prep and cooking methods. Any lovestruck fool can pull this off.

Instead of a single round layer called for in the recipe, I used an 8x8 square pan and cut large and small hearts from the cooked cooled cake. Then clumsily glazed and decorated them. I mean, the flowers look decent but I could have done better on that glaze! Thank goodness no one cares.

The glaze is also easy and can be poured or spread over the hearts. Okay yeah, it’s a little fussy but it’s easy fussy, I promise. And those little flowers? Also easy, with a can (one can't always Martha-Stewart-from-scratch their way through these things) of Betty Crocker Cupcake Icing in Petal Pink using the star shaped tip.

Give it a small squoosh for a pert little carnation, and swirl it around a few times in a gently widening circle for a rose. Here’s a mouthwatering tutorial for these easy roses. Stop squirming, they’re easy I tell you! Just practice a few times on wax paper. If you don’t want roses, squoosh whatever you like on top.

When it was time for dessert, we scooped Breyer’s strawberry ice cream into bowls and plopped a heart on top. And ate. And wished each other a happy Valentine’s Day while we lapped up two hours of Downton Abbey.

Happy Valentine’s Day to you and yours!
Chocolate Velvet Cake
from Baker's
1 package (4-oz.) Baker’s German’s Sweet Chocolate*, broken in pieces
6 Tablespoons butter or margarine
3 Tablespoons all-purpose flour
3 eggs, separated
4 Tablespoons sugar
Chocolate Glaze (recipe below)
Preheat oven to 350 degrees F. Grease and flour an 8-inch round cake pan or an 8x8 square pan. Melt chocolate and butter in medium saucepan over very low heat, stirring constantly until smooth. Remove from heat; stir in flour. Blend in egg yolks, one at a time.
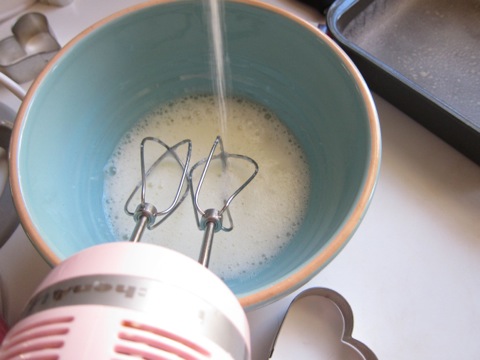
In a medium sized bowl, beat egg whites with hand mixer on medium-high speed until foamy throughout. Gradually beat in sugar; continue beating until soft peaks form. Gently fold chocolate mixture into egg whites, blending thoroughly.
Pour batter into prepared pan. Bake for about 20 minutes or until cake tester inserted in center comes out clean. Cool in pan 10 minutes (cake will settle slightly). Finish cooling upside down on rack. Spread top and sides with Chocolate Glaze. OR cut into hearts with cookie cutters, then glaze. Top with frosting flowers.
At room temperature, the cake is velvety, indeed. When refrigerated, the frosted cake turns fudgy but still somewhat light and velvety. I would be hard-pressed to decide which way I like it best.
*I used regular ol' Baker's Semi-Sweet chocolate, since I had it on hand already.
Chocolate Glaze
1 package (4-oz.) Baker’s German’s Sweet Chocolate, broken in pieces
3 Tablespoons water
3 Tablespoons butter
Melt chocolate and water in medium saucepan over very low heat, stirring constantly. Remove from heat and stir in butter until melted. Pour gently over cooled cake, or cool to thicken and spread onto cake.
Little Welsh cakes.
Quick ... name a Welsh dish. 
Wait, did you really just think Tom Jones?? Well okay, T.J. might be dishy to some, but I expected you to think something like "Welsh rarebit" which is, in fact, an actual Welsh dish -- the kind you eat, not toss your knickers at -- only it's "rabbit" not "rarebit" and it doesn't have any rabbit in it, just cheese and mustard and sometimes beer.

Welsh rabbit (which I grew up calling "rarebit") was the only Welsh dish I ever knew about until I bought my first book of Welsh cooking and discovered pretty little Welsh cakes.
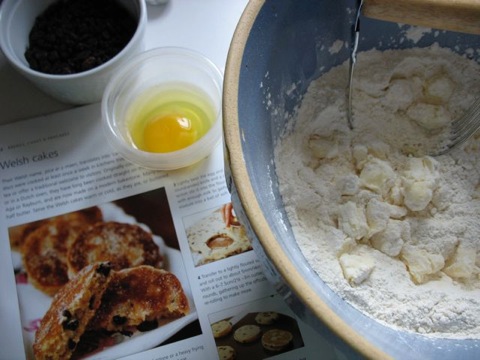
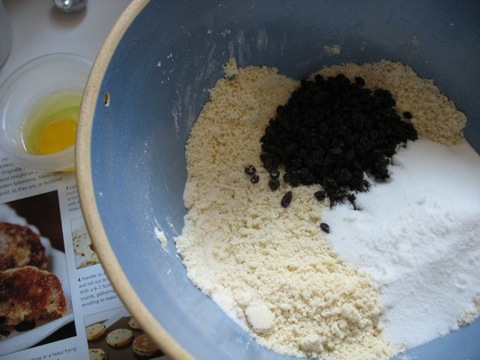
Welsh cakes -- called "picau ar y maen in the mother tongue -- look like pancakes, and are like a cross between scones and shortbread, slightly sweet, studded with petite currants, and cooked on a griddle or a bakestone. (or a "girdle" as they used to say)
And boy are they Welsh! It seems like they are a Welsh national culinary treasure, and you can’t visit Wales without sampling Welsh cakes.

These sweet cakes combine simple, inexpensive ingredients -- butter, flour, sugar, currants, spices, egg -- and an unfussy cooking method into tasty little treats.
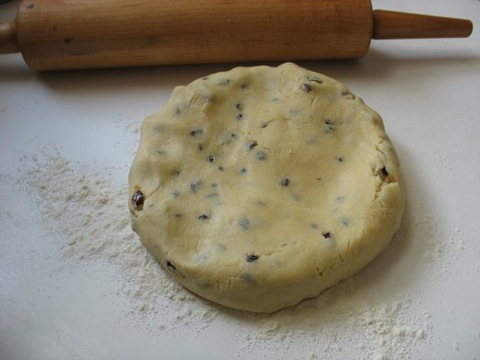
They couldn’t be simpler to mix up, roll out, shape and cook with just a little oil, butter or a spritz of cooking spray. Ideally, they are cooked on a well-seasoned cast iron Welsh bakestone, but those are hard to come by in these parts so a griddle or non-stick frying pan will do.
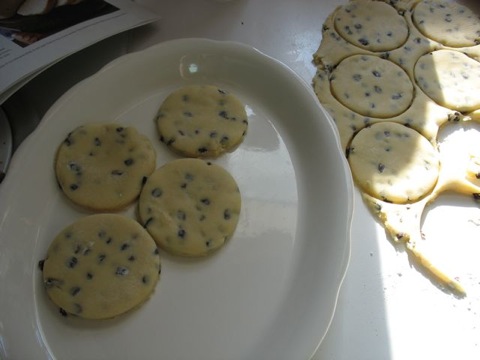
The cakes cook quickly and disappear before you know it, leaving delightful sugar dust on your fingertips. They would benefit by a little cinnamon or nutmeg in the dough, and perhaps mixed in with the sugar before sprinkling it on the cooked cakes. Otherwise they are perfect with a cup or tea or coffee and best eaten warm off the griddle. They freeze well and reheat nicely if wrapped in foil and popped into the oven or toaster oven.

Watch this charming video of someone's Grandma Betty making Welsh cakes. Betty reminds me very much of my own mom, although mom's ancestry was Irish. If you listen closely, you might catch Betty saying her bakestone is over 100 years old!

A real bakestone would be a fun addition to my kitchen tools, along with a Scottish spurtle for making oatmeal. But alas, they are not readily available over here, are heavy and therefore expensive to ship. I was going to ask Santa to send me a bakestone for Christmas, but I think it would seriously weigh down his sleigh, even with his superhuman strength and reindeer power. Someday we'll visit the motherland and bring one home with us.

I wonder if my Welsh ancestors enjoyed Welsh cakes? They must have. I shipped a few to my dad, whose grandfather David Evans emigrated from Wales to Milwaukee, Wisconsin and ran a general store there for many years.

Dad loved the cakes, and he has Wales in his blood so he must have an innate taste for good Welsh cooking. Here's hoping great grandfather Evans would like them too.
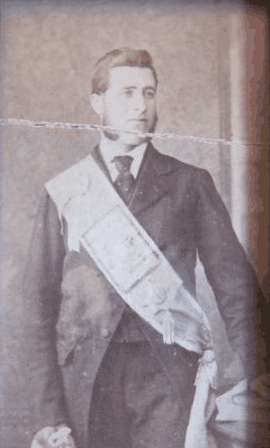
David Evans, age 20, 1872.
* * * * * * * * * *
Welsh Cakes
From "The Best of Traditional Welsh Cooking" by Annette Yeats
2 cups all-purpose flour
1-1/2 teaspoons baking powder
pinch of salt
1/2 cup butter, diced
1/2 cup caster or superfine sugar
1/2 cup currants
1 egg
3 Tablespoons milk
superfine (or caster) sugar, for dusting
Sift the flour, baking powder and salt into a large mixing bowl. Work the butter into the flour mixture with your fingertips, a pastry blender or two knives until the mixture resembles fine breadcrumbs. (Alternatively, you could process the ingredients in a food processor.) Stir in the superfine sugar and the currants.
Lightly beat the egg, then stir it into the flour mixture along with enough of the milk to make a ball of soft dough.
Transfer dough to a lightly floured surface and roll out to about 1/4" thick. Cut out rounds with a 2-1/2" to 3" cutter. Gather up the remnants and re-roll to make more cakes.
Heat a heavy frying pan or griddle over low to medium heat. Melt some butter on the hot pan, or grease with cooking oil or cooking spray. Place cakes on hot greased pan and cook in small batches for about 4-5 minutes each side or until they are slightly risen, golden brown and cooked through.
Transfer cooked cakes to a wire rack, dust with superfine sugar on both sides and leave to cool. Then enjoy with a pot of good tea, your favorite coffee, a tall glass of cold milk, or whatever strikes your fancy. Iechyd da!*
Variations: Add 1/2 teaspoon or more of mixed spices, such as cinnamon, pumpkin pie spice, allspice. Also, you can add 1/2 teaspoon or more of vanilla extract into the egg before mixing it with the flour mixture.
*(Yeh-chid dah = Cheers! in Welsh)
C'mon don't be shy ... feel free to leave a comment below.
Atholl Brose: nectar of the Scots.
 Until recently, I knew "Athole-Brose" as a dreamy, soaring song by the Cocteau Twins, a Scottish alternative rock band "known for complex instrumentation and atmospheric, non-lyrical vocals." Yep, Wikipedia summed them up nicely. The Twins' mysterious lyrics and quirky song titles like "Ella Megalast Burls Forever" and "Spooning Good Singing Gum" make for a pretty unique musical experience.
But this post is about liquor, not music. The original Atholl (or Athole) Brose is a sweet-ish libation stirred up from three traditional Scottish ingredients--honey, oats, and whisky--into a creamy heady broth, or "brose." Whiskipedia (the encyclopedia of whiskey!) explains that "... brose is a Scottish form of brewis or broth, deriving from the Middle English browes ... Brose is oatmeal with boiling water or milk poured over it, and Atholl Brose is a mixture of oatmeal, whisky and honey." NOTE: Whisky = Scotland ... WhiskEy = everyone else.

Sound weird and unappetizing? You're right ... it DOES sound weird and unappetizing. However, if you like Irish cream type liqueurs, you'll probably like Atholl Brose. And remember that oats are a heart-healthy superfood, so you might actually live longer quaffing some Atholl Brose now and then. Or daily.
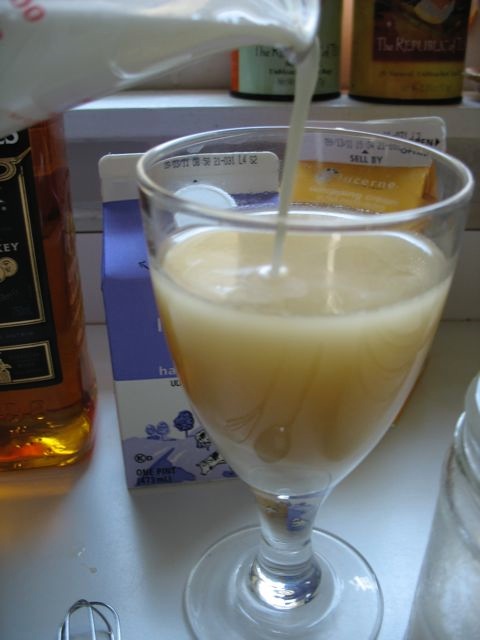
Some Atholl Brose recipes call for just the oats, whisky and honey, resulting in a clear(ish) brew, and some add measures of heavy cream for a slightly more substantial liqueur. If the cream is whipped and mixed with toasted oats, the Brose becomes dessert. In the interest of truly thorough research, I made both.

For lack of a better term, oatmeal gets sort of goopy while it's cooking, but it's the goop that helps create an oatmeal "liquor" which is the base for Atholl Brose. Soaking rolled oats in water for a short time, then straining and pressing out the liquid, yields an opaque, oaty essence that comes to life with honey and whisky (who wouldn't!).
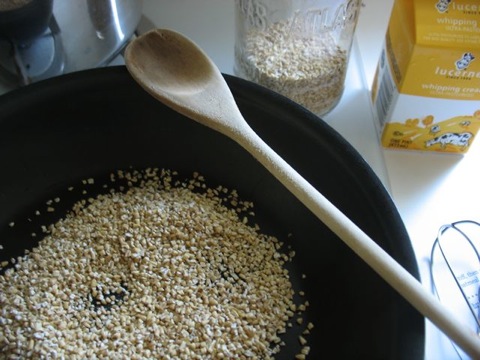
I found that rolled oats were best as they produce more of the essence (goop, if you will) than steel cut oats, which is my new favorite oatmeal.

If this talk of oatmeal is giving you flashbacks to gluey gray globs served by your ever-lovin' mum on cold school mornings, wait! it gets better, honest. Once the oatmeal essence is extracted, stir in some honey (the clover variety is fine, but if you can get your mitts on Scottish heather honey all the better), a slug of whiskey (again, Scottish whisky would be swell but I used Irish Bushmills--highly recommended by my father-in-law for novice whiskey drinkers like us) and some heavy cream. Mix, chill, pour, sip ... ahhh. It might remind you of egg nog, although it's not nearly so thick and sweet, and it would be fine sprinkled with some cinnamon or nutmeg--like a drunken oatmeal cookie. But it's tasty all on its own.
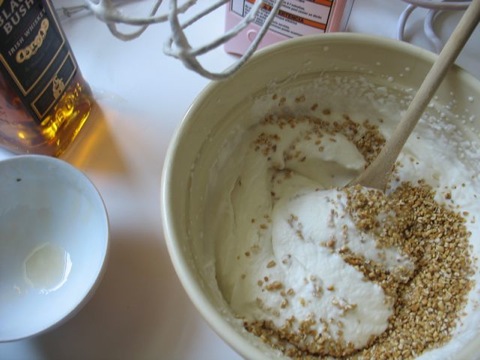
When you crave something fluffier and desserty, whip up the cream first, then beat in the honey-whisky mixture and stir in some toasted rolled or steel cut oats. Top with a few berries and a sprinkling of oats. You'll have a sweet whisky cream with some pleasant chewy substance to it.

As for what put the Atholl into this brose ... back in the mid(ish) 1400s in or around Blair Atholl, Perthshire--smack in the middle of Scotland--the 1st Earl of Atholl was at the business end of a Highland rebellion being carried out by the 11th Earl of Ross. Knowing his Scottish kinsmen's taste for spirits--and oats, and honey--the Earl of Atholl poured all three down a well that the Earl of Ross liked to drink from, creating an irresistible and intoxicating nectar: Atholl's Brose! I can't help but think that was an awful waste of good pantry staples. But sure enough, No. 11 drank the heavenly mixture until he was sufficiently impaired and easily captured by No. 1. Hooray! What this means in the vast history of Scotland, I'm not sure, but since my mother discovered we are distantly connected to the lineage of Atholl and the Clan Murray, I'm siding with the 1st Earl on this one. A visit to Blair Castle will certainly be on our Scotland itinerary someday.

When you're done here, scuttle over to YouTube and have a listen to "Athole-Brose." Then stir--or whip--up a batch of Atholl Brose, and feel your oats. You just might feel a bit friskier after a helping!

I found this recipe for Atholl Brose via Kate Shea Kennon of BlogCritics.org. She says it is "attributed to the Royal Scots Fusiliers from André Simon's 1948 A Concise Encyclopædia of Gastronomy: Section VII, Wines and Spirits." The oats need to steep overnight, so start the recipe the day before you want to sip. How those fusiliers found the time to mix up Atholl Brose I don't know, but I imagine it kept them warm and satisfied during cold military marches.
Atholl Brose Liqueur
Makes one serving--can be doubled, tripled, quadrupled, or multiplied as needed to fill up a well
1/2 cup oatmeal, ideally "old fashioned" rolled oats (not instant)
1-1/2 cups cold water
3-1/2 oz. whiskey
2-1/2 oz. cream (heavy whipping or half-and-half)
1/2 oz. (1 tablespoon) honey
Mix oatmeal and cold water in a jar or measuring up; cover and let steep overnight. The next day, place a mesh strainer or two thicknesses of cheesecloth over a bowl. Pour the mixture into the strainer or cheesecloth, catching the liquid in the bowl. Press as much of the liquid from the oats into the bowl as well.
Give the resulting liquid a good stir, then pour 3-1/2 oz. of it into a large glass. Add the whiskey, cream and honey. Stir together well. Recipe can be doubled, because you want to share the brose with a friend, right?
* * * * *
Whipped Atholl Brose
4 servings, more or less
The whipped version is equally tasty, with chewy nuggets of toasted oatmeal to keep your mouth busy and your tummy satisfied. It works beautifully as a dessert. Recipe adapted from Foodness Gracious, a California food blogger. He's a Scottish ex-pat, so he must know what he's talking about. Hopefully the heart-healthy effects of oatmeal counter the heavy cream. Don't think about it! Just eat and enjoy.
1/3 cup rolled "old fashioned" (not instant) or steel cut oats
1-1/4 cups whipping cream
3 tbsp honey
2-3 tbsp whiskey
In a large non-stick skillet, carefully toast the oats over medium heat until fragrant and lightly browned. Remove pan from heat and pour toasted oats into a small bowl.
Pour whipping cream into a medium bowl. Beat with an electric hand mixer on high speed until it forms soft peaks. Mix the honey and whiskey together until the honey dissolves; pour into the whipped cream and continue beating a few more minutes. The cream should still be soft, not stiff. Stir in the toasted oats. Chill for 30 minutes and serve in small bowls. Top with berries, a sprinkle of oats, thin cookies (Pepperidge Farm Bordeaux cookies would be nice) or whatever inspires you.
Tha sin glè mhath! (Scottish Gaelic for "Excellent!" Or so I'm told.)
Feel your (steel-cut) oats.
 An Englishman and a Scotsman were discussing oats. The Englishman, with his nose in the air, said, "In England we feed oats to our horses, and in Scotland you feed oats to your men." To which the Scotsman replied "That's why in England you have such fine horses ... and in Scotland we have such fine men!"
The weather is cooling off wonderfully here in the midwest. After yet another hot, humid summer, it’s bliss sleeping through the night under a warm flannel sheet with the window open, and waking up with an appetite for hot cereal, especially a bowl of my new favorite--steel cut oats.
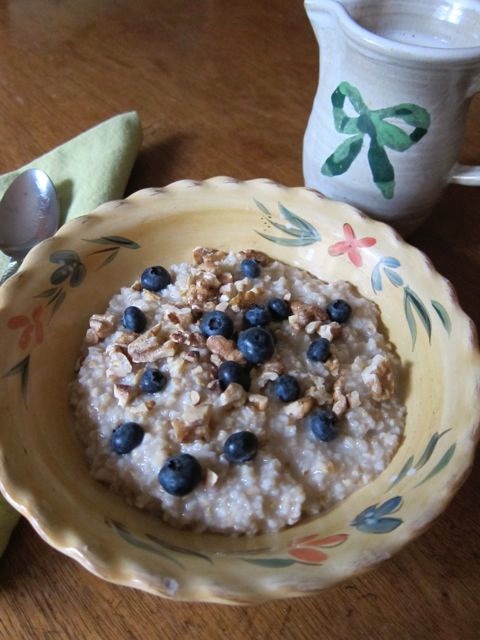
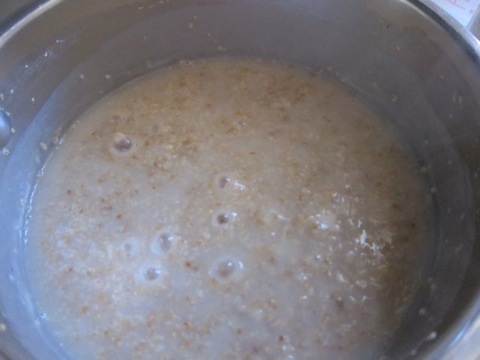
Remember those gooey, comforting globs of (by the time you got to the table cold) rolled oats you had for breakfast before school? Such memories! These are different and, in some ways, better and more grownup. Steel cut oats have a nice chewy texture with some of the familiar and comforting gooeyness, but much less glueyness, of regular oatmeal. They also take longer to cook--steel cut oats are whole oat groats chopped (well, cut) into little nubs rather than steamed (essentially pre-cooked) and flattened like rolled oats, so it takes a while for boiling water to plump them up: about 30 minutes, and well worth the wait.
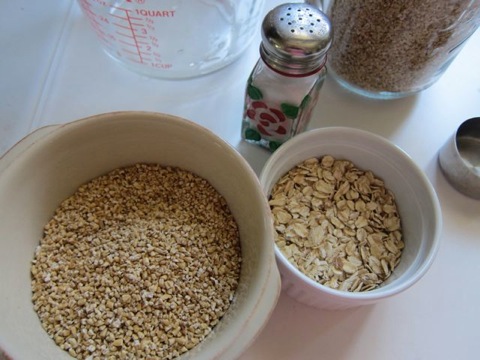
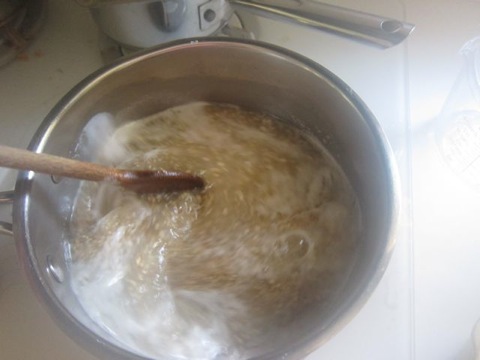
The long cook time for steel-cut oats means they’re not exactly a convenient work day breakfast. They require some patience and stirring (clockwise, according to tradition), better for a slow Sunday morning while sipping your coffee or tea. To enjoy them during the week, I make a batch before bedtime by boiling water and oats together for 10 minutes, then turning off the heat, covering the pan with a lid, and letting it sit overnight. By morning the oats have absorbed the remaining water and all that’s needed is a few minutes of re-heating. Leftovers are plopped into a plastic container and stored in the fridge--they heat up nicely on the stove or in the microwave.
Oats like cool, wet weather so they thrive in the U.K. as well as countries like Russia, Canada, Finland, Poland and the American midwest. And although Scotland grows more barley than oats, oatmeal seems to strongly characterize Scotland’s culinary culture, alongside heather honey, whisky, and salmon. Scottish and Irish cookbooks are full of recipes calling for oats--pheasant, herring and fish cakes rolled in oats, leek soup thickened with oats, an oatmeal-onion stuffing called skirlie, fruit crumbles, boiled puddings, bannocks, cranachan, oatcakes, the hearty oats-whisky-honey liqueur known as atholl brose (blog post coming soon!), haggis, stout, and of course traditional oatmeal porridge.
For an authentic Scottish oatmeal experience, use a wooden spurtle--an approximately foot-long stick with a rounded tip used to stir the oats while they cook (that rounded tip helps you keep cooked oats from hiding in the corners of the pan). Then only salt on your cooked oats, no brown sugar or milk, and each spoonful is dipped into a separate bowl of cream before eating.

I hope the Scots forgive me for not following those serving rules--what is oatmeal without my splash of evaporated milk and drizzle of honey or some brown sugar? Sometimes a sprinkling of toasted walnuts, and when the price is right a handful of blueberries or blackberries. That would be three "superfoods" in one bowl! Oats, blueberries and walnuts are superfoods--that is, they are not only awesome because they taste so good, but they are extra awesome because they have been proven to do super things for your health. Oats, for example, help lower cholesterol and have minimal impact on your blood sugar, while blueberries and walnuts have antioxidant and anti-imflammatory benefits to help prevent cancer and other diseases. You could just about almost live forever eating superfoods. (NOTE: This statement has not been evaluated by the Food and Drug Administration. But it's true--forever. Almost.)

We've been eating oatmeal throughout the summer (except when it was, like, 97 hot humid degrees out) and it is all the more satisfying now that fall is here. And this winter, when the weather turns truly frosty, I may even add a warming slug of whisky to each bowl. Although it's possible I might not wait until then.
P.S. You've seen those nice looking cans of McCann's Irish Oats on grocery store shelves, yes? The ones that go for oh, about $4.50 per pound? Well here's a secret: you can get bulk steel cut oats at Whole Foods for $1.39 a pound. Bargain! That won't take your whole paycheck. You'll live longer and have more money in the bank. Oatmeal is super, indeed.
Steel Cut Oats, Two Ways
Way 1 (30-minute method):
Serves 4, recipe can be halved
4 cups water
1 cup steel cut oats
dash of salt
Bring water to boil in medium to large saucepan. Add oats and bring to a boil again. Let mixture bubble and cook for about ten minutes, stirring occasionally (with a spurtle, if you've got one!). Reduce heat and let simmer, stirring occasionally, for another 20 minutes. Serve hot with milk, cream, yogurt, honey, sugar, bananas, berries, etc.
Way 2 (overnight method):
Serves 4, recipe can be halved
4 cups water
1 cup steel cut oats
dash of salt
Bring water to boil in medium to large saucepan. Add oats and bring to a boil again. Let mixture bubble and cook for about ten minutes, stirring occasionally--clockwise of course. Remove from heat, cover with lid, and allow to stand overnight on stove or in refrigerator. In the morning the oats should have fully absorbed the remaining water. Warm oats over medium heat (or in the microwave, if you must). Serve with the usual toppings.
As American as ... peach and blackberry crisp.
 Oh no, summer is almost over! Did you enjoy lots of seasonal fruits while they were available? We did -- plenty of ripe nectarines (my favorite), blueberries, at least one watermelon, some cantaloupe, and most recently peaches and blackberries baked into a nutty, juicy fruit crisp.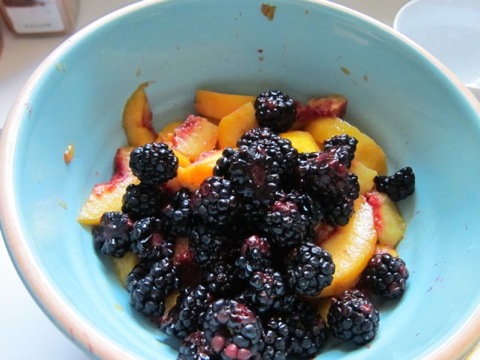
Fruit crisps and cobblers seem to be uniquely American desserts -- who doesn’t associate peach cobbler with southern cuisine? And in my childhood we made applesauce and ate endless apple crisps after a day of early fall apple picking.

According to What’s Cooking America, crisps and cobblers evolved from early settlers, who adapted their favorite Old World meat-and-pastry dishes to New World produce and cooking methods. The Brits brought recipes of sweet or savory fillings cooked (or "cobbled") together with a crust or biscuity topping (which some say resembled cobblestones), from which we Yanks created some of our familiar pot pies and cobblers. And their fruit "crumbles" became our crisps.
Variations on the fruit-and-dough theme can be found in recipe boxes and church cookbooks throughout our fair land, with folksy names like brown Betty, buckle, grunt, pandowdy, slump and sonker. Say, how about a generous helping of blueberry sonker!
To enjoy summertime fruit without a lot of preparation, there is (almost) nothing easier than the fruit crisp, or “crumble” to my U.K. relations. Unlike fruit pies, which require two thinly rolled crusts, crisps need only a sweet crumbly oatmeal-butter-flour mixture which is sprinkled over the fruit -- much easier for casual cooks than rolling circles of dough, then draping, pinching, poking, and praying the bottom doesn’t come out soggy and the top doesn’t brown too quickly. Okay, it’s not that tricky, but crisps are, by comparison, much easier!

Peeling and slicing fresh peaches is easy, and tossing them with a little sugar and whole blackberries, blueberries, raspberries or whatever else strikes your fancy is even easier.

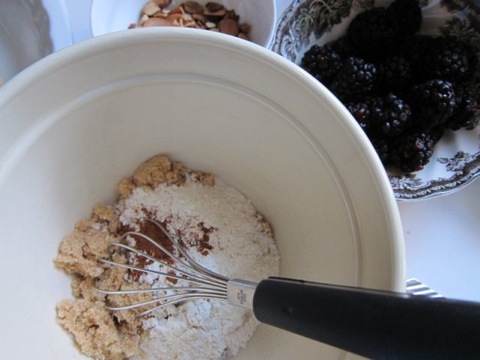
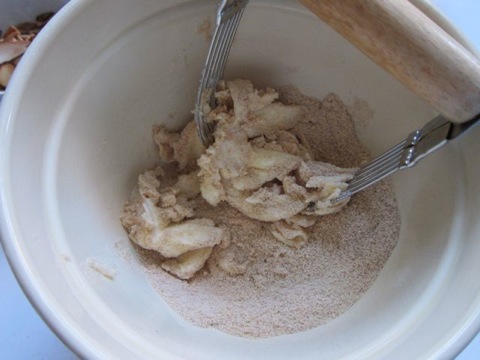
You’ll have to put a wee bit of elbow grease into the topping, but not much. Cutting butter into flour can be satisfying, in a repetitive-motion sort of way. I use a pastry blender, but you can slice at it with two knives, a fork, or just dig in with your hands and work it together with your fingers. Then stir in sugar, oats, nuts (I like toasted almond slivers) and spices, and you’ll have a nice mixture that is either crumbly or might resemble loose oatmeal cookie dough, depending on how soft your butter is. Sprinkle evenly on the fruit, or pull off small globs and plop them around the fruit as evenly as possible. (I popped a few of those globs into my mouth first, for testing purposes. Yum.)

In 30 minutes it will cook into a beautifully golden, crispy top with juicy stewed fruit underneath. Vanilla ice cream or whipped cream go wonderfully with fruit crisp, but we ate it straight up, with some tea on the side.

If you want to savor the last weeks of summer, make some crisp with whatever summery fruits are still available at your farmer’s market or grocery. Or try pears and apples, to acknowledge the coming of fall. And in a few weeks, as we wave down the sun on the Autumnal Equinox, we can start thinking about heartier cold-weather fare ... like anything with pumpkin! But for now, summer.

Peach and Blackberry Fruit Crisp
Adapted from the Better Homes and Gardens Cookbook
Be creative with fruits and spices in this recipe -- fruit crisp is very versatile!
4 cups sliced peeled peaches (about 4 medium peaches)
1 cup blackberries
2 tablespoons sugar
1/4 cup all-purpose flour
1/2 cup packed brown sugar
1/2 teaspoon cinnamon
1/4 cup butter or margarine
1/2 cup rolled oats
1/4 cup chopped toasted almonds
Preheat oven to 375 degrees. Mix fruit gently with 2 tablespoons sugar in a bowl until sugar dissolves. Pour into an 8- or 9-inch round pie plate or baking dish.
Combine flour, brown sugar and cinnamon/spices in a medium bowl. Work butter into flour until mixture resembles course crumbs (or, in my case, until it resembles cookie dough). Mix in oats and nuts until well combined. Sprinkle over top of fruit until evenly distributed.
Bake for 30-35 minutes or until fruit is tender and topping is golden and ... crisp. Serve warm, with ice cream or whipped cream if you're feeling naughty.
Pasta with smoked salmon cream.
Salmon is my favorite fish. It's so pretty and meaty and tasty, no splintery bones to deal with, and it goes with just about everything you can think to serve it with, except perhaps chocolate. Although ... hold it ... a quick Google search and ... anyone for salmon goat cheese wraps with chocolate ganache? salmon with white chocolate sauce? hot chocolate salmon pancakes? (I might actually try that one.) If those are all too weird how about a nice fish-free solid chocolate salmon. 
Smoked salmon, I have to say, is a bit of a different story. As a rule, I don't like smoked fish. I don't really like smoked anything, not even barbecued potato chips! They're too smoky, and on my tongue that smoke flavor obliterates the taste of the actual food. I do like cheddar potato chips and cheese just about everything ... even, surprisingly, smoked Gouda (I think) and Blarney (although I can never find it anywhere).

Ah, but Einstein Bagels' smoked salmon cream cheese (or "shmear" as they call it) has nudged me ever so slightly in the direction of smoked salmon. I could eat bowlsful of that stuff! It's more than wonderful on toasted Everything bagels, with extra Everything sprinkled on top. (I make my own Everything -- poppy seeds, sesame seeds, dried garlic and onion, kosher salt all lightly toasted in a skillet and stored in a jar.) We finally stopped ordering puny little sides of salmon cream cheese whenever we venture into Einstein's -- now we grab a full-on 8 oz. container of it and spread it with abandon.

Despite the "smoked" part, this Pasta with Smoked Salmon, Cream, and Dill recipe has beckoned to me ever since I opened the May 2004 "A Taste of Scotland" issue of Bon Appetit. I have a weakness for pasta with some sort of creamy sauce (and a few twists of black pepper and grated parmesan cheese). Now that I've had a bit of exposure to smoked salmon, I'm finally ready to give this dish a try.
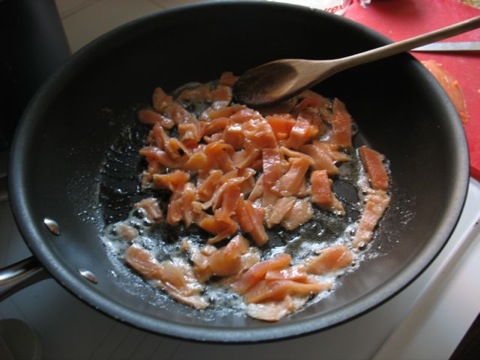
Like Salmon with Watercress Sauce, this dish is reasonably quick and easy to make, and requires just a few ingredients, nothing fancy. The recipe calls for 12 ounces of smoked salmon -- that felt a bit much to me so I bought two of those skinny li'l 4-ounce packets from the fish department at the grocery store, and for this smokeless gal the dish would have been just fine with only one. Four ounces of smoked salmon pack a LOT of smoky flavor! For me, anyway.
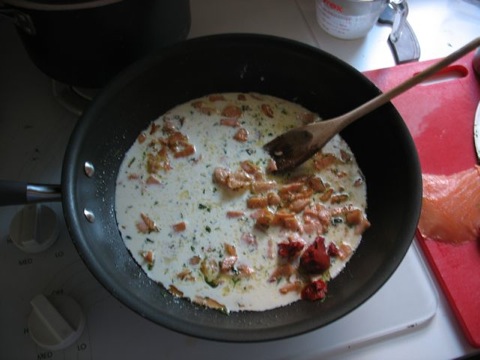
The smoked salmon is chopped or slivered, sauteed in butter (yum!) then further cooked in heavy cream (forget about fat and calories at this point), stirred into cooked penne pasta and topped with fresh dill. It's like fast food, and is quite tasty! Although I confess it was still too smoky for me, even after cutting down the salmon by half. I'm obviously very sensitive to smoked fish. My Sweet Husband, on the other hand, eats smoked salmon straight up (must be his Scottish heritage) -- it was not too smoky for him. When I make this dish again, I will either poach the smoked salmon first in a small amount of milk, then pour off that milk and skip straight to the cream and dill mixture in the skillet, bypassing the butter. Or combine maybe two ounces of smoked with slivers of fresh salmon, to allow some of the smoky salmon flavor into the dish but not too much.
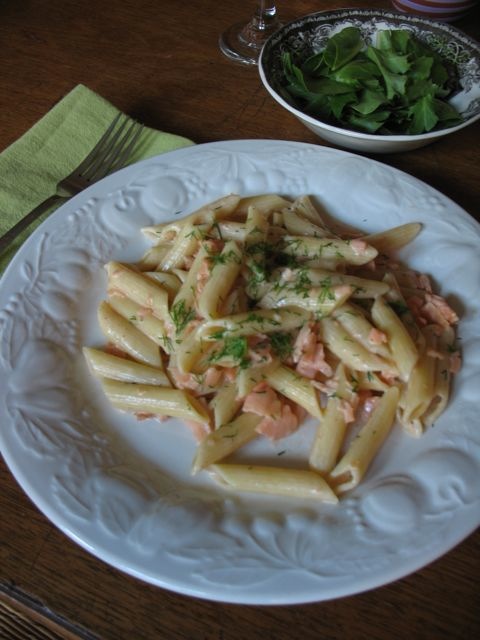
The recipe comes from Valvona and Crolla, a family-owned Italian grocery, cafe and wine bar in Edinburgh, Scotland that is well known throughout the U.K. I first heard of V&C from the 44 Scotland Street stories by Alexander McCall-Smith. As Sweet Husband and I both descend from Scottish ancestors, eventually we'd like to take an official honeymoon (it's been three years already!) to the motherland. Even if that honeymoon is a long way off, for now we can eat like we're on Elm Row in the heart of Edinburgh.

Hopefully we'll get a chance to personally tell the V&C folks how much we enjoyed their salmon pasta back in the U.S. Slainte!
Feel free to leave a comment about smoked salmon, pasta, salmon and chocolate, Scotland, bagels and cream cheese, or whatever inspires you.
* * * * *
Pasta with Smoked Salmon, Cream, and Dill
Adapted from a Valvona & Crolla recipe appearing in
Bon Appetit "A Taste of Scotland" issue, May 2004
9 ounces dried penne, linguine, or your favorite pasta
1 tablespoon butter
4 ounces smoked salmon (or up to 12 ounces*, depending on your preference for smoked salmon),
chopped into bite sized pieces or cut into 1/3-inch-wide strips
1 cup plus 2 tablespoons whipping cream
1 teaspoon tomato paste
3 teaspoons chopped fresh dill, divided
1/8 teaspoon cayenne pepper
Cook pasta in large pot of boiling salted water until tender but still firm to bite, stirring occasionally. Drain, reserving 1/4 cup cooking liquid.
While pasta is draining, melt butter in large heavy skillet over medium heat. Add salmon and cook until fish turns light pink, stirring frequently, about 2 minutes. Stir in cream and tomato paste. Cook until sauce is heated through, about 2 minutes. Stir in 2 teaspoons dill and the cayenne pepper. Mix pasta into sauce (or pour sauce into pasta), adding pasta cooking liquid by tablespoonfuls as needed to moisten. Divide pasta among 4 plates or shallow bowls. Sprinkle with remaining 1 teaspoon dill and serve.
*If using more than 4 ounces of salmon, increase butter to about 1 tablespoon per four ounces of fish.
Chocolate Biscuit Cake.
 Ever since the recent royal wedding, where Prince William’s favorite “chocolate biscuit cake” was served, I’ve been wanting to jump on the chocolate biscuit cake train.
Actually, I’ve been wanting to jump on a plane to London to hobnob with the Windsors, but making this simple refrigerator cake seemed like a less expensive way to feel kinship with the royals.

Traditionally made from crushed Rich Tea Biscuits -- crisp, not-too-sweet British cookies -- mixed into a warmed chocolate mixture and glazed with chocolate ganache (a LOT of chocolate here), the no-bake cake is apparently a much-loved tea-time treat for Prince William. So in addition to traditional wedding fruitcake (I’ll be making that in the next few months!), this “groom’s cake” was served at the prince’s request.

Reminder: “biscuits” in the U.K. are “cookies” here.
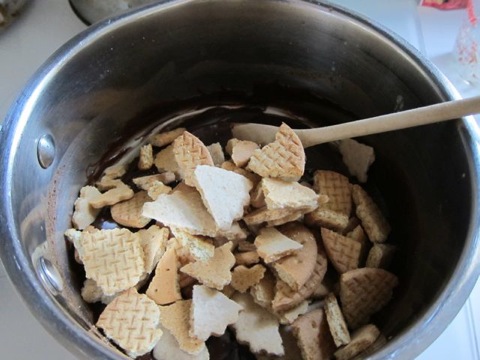
With a surplus of homemade digestives biscuits, plus some Burton’s Digestives, there was no time like the present to finally make this cake. I would have used the Rich Tea biscuits, only I didn’t locate them until after I had made the recipe. Why o why hadn’t I checked Treasure Island first? Lesson learned.

Recipes for Chocolate Biscuit Cake abound on the interwebs, many calling for caster sugar (“superfine” to you and me), golden syrup (a by-product of the sugar refining process -- sort of like pale amber colored corn syrup), cocoa powder, sometimes an egg. And quite a few allowed digestives to replace Rich Tea, so scour the World Market shelves for Rich Tea Biscuits, Jacobs Marietta Biscuits, Burton’s or McVitie’s digestives, or use a plain, crisp and barely sweet cookie from the grocery such as Lu Petit Buerre. One blogger I found used Salerno Butter cookies, and another used graham crackers.

I was more attracted to the recipes with heavy cream or sweetened condensed milk, butter, squares of semi-sweet chocolate, and no eggs. After exhaustive online research, which included some unsightly drooling on my keyboard, I settled on the recipe from Dima’s Kitchen. Four ingredients! I like that.
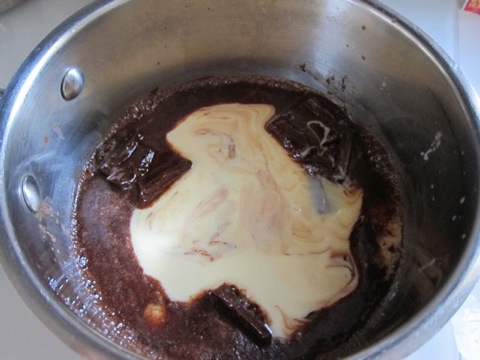
The recipe is simplicity itself: heat the butter and sweetened condensed milk (I managed to muddle this instruction by instead melting the butter with the chocolate, but I don’t think this hampered the outcome), add chocolate to melt, mix in crushed cookies -- oops! biscuits -- spread in a prepared 6" springform pan (you want a small pan so the cake has some height), chill for several hours, glaze, slice, eat. Gain weight, work out like a maniac, lose weight, feel proud. Repeat as many times as necessary from “heat the butter and ...” for eternal chocolate-fueled happiness.

Many recipes call for a topping of glossy chocolate ganache. Ganache is darned easy to make so don’t be intimidated by the fancy French name. It’s warmed heavy cream with dark chocolate melted into it. That’s it. And you can give up counting the fat and calories right about now.

Once the cake has sufficiently chilled, release it from the pan and -- here’s the trick to a really pretty cake -- turn it upside down. The top of this cake is fairly lumpy and homely. Turning it upside down reveals the nice flat bottom, which makes a lovely smooth surface for the ganache.
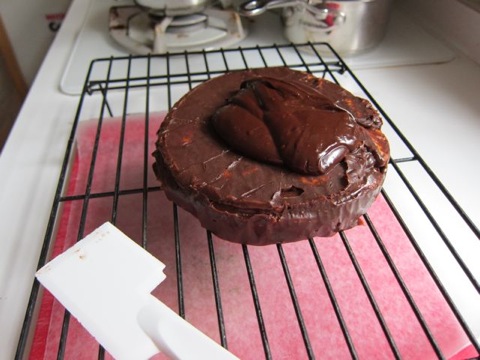
Before the ganache set, I decorated the top with some blooms from my garden, as well as a few fresh raspberries and leaves from my friend Shay’s yard. At first I put a small clipping of cheerful orange butterfly weed, then yanked it out when I found out it’s TOXIC. Yikes! But didn’t it look pretty?

(NOTE: I think it takes a lot of butterfly weed to make someone sick, but I wasn't taking any chances.)
William's cake was a vision of modern culinary construction, all masculine right angles and austere white chocolate lilly flowers. It included some “secret ingredients” that McVitie’s, who “baked” the biscuit cake for the royal couple, would not reveal. Oh, how I wish I could have tasted a slice of that supersecret cake. And the wedding fruitcake, too.

The finished biscuit cake is truly a chocolate lovers delight -- creamy fudgy chocolate, crisp mildly sweet cookies, and the smoothest, most decadent chocolate glaze you’ve ever tasted. It defies easy categorization -- cake? cookie? candy? Ah, how about ... confection! And from just a few ordinary ingredients. Next time I’ll use Rich Tea biscuits, add dried cherries and toasted pecans, and possibly even spike the chocolate with some brandy, bourbon or whisky. There's lots of creative potential with this recipe.

Naturally one eats slices of chocolate biscuit cake with tea. Cheers! And here's to a long, blissful marriage for the happy couple. Obviously Kate, with her impossibly tiny waistline, is not overindulging in chocolate biscuit cake. Or else she's working out like an absolute maniac.
Please feel free to leave a comment below -- I love to hear what you think of the recipe, post, or anything else you want to talk about.
Chocolate Biscuit Cake
Adapted from Dima's Kitchen
6-8 oz. your choice of Tea biscuits or cookies, broken into pieces
4-5 oz. good semi-sweet chocolate, coarsely chopped
3/4 cup sweetened condensed milk
1/4 cup (4 tablespoons) butter
Chocolate Ganache (see below)
Grease or butter a 6" round cake pan (a small springform pan is ideal), then line with parchment paper along the bottom and the sides.
In a small saucepan, combine sweetened condensed milk with the butter and stir over low heat until butter is melted and mixture is smooth. Remove from heat. Add chopped chocolate and stir until all chocolate is melted and mixture is smooth again. if tiny chocolate pieces persist and do not melt, use a rotary beater to beat the mixture till smooth. Remove from heat.
Add broken biscuits/cookies to the chocolate mixture and stir all to combine thoroughly. Spread into prepared pan, pressing to fill the corners of the pan. Refrigerate for 3 hours. Remove from pan, place upside down on a wire rack and pour chocolate Ganache over the cake; spread over top and sides to cover it. If desired, decorate with fresh (not toxic!) or candied flowers, or other decorations. Refrigerate for 2 hours before serving or until firm. Slice thinly -- this cake is rich.
Chocolate Ganache Glaze
Adapted from Dima's Kitchen
This is half of Dima's original recipe.
1/2 cup heavy or whipping cream
6 oz. good semi-sweet chocolate, chopped
In a medium saucepan, bring whipping cream just to boiling over medium heat. Remove from heat. Add chocolates (do not stir); let stand for 5 minutes. Stir until smooth. Cool for 15 minutes. Spread evenly over biscuit cake.
Digestive Biscuits.
Have you ever had a digestive biscuit with your tea?
Here in the U.S. of A. “digestive biscuit” could evoke an image of something strange, indeed. First off, here a biscuit is a quick bread akin to a scone, and is frequently used to sop up dinner juices or served smothered in sausage gravy for breakfast (but not in my house). Growing up we often ate biscuits -- like these cheddar biscuits -- warm topped with butter.

Then the “digestive” part doesn’t sound too appetizing ...
But in the U.K. biscuits are cookies! Biscuit comes from Medieval Latin, via a detour through France, meaning “twice cooked,” like biscotti. Whereas cookie, according to everyone’s favorite free online encyclopedia, comes from the dutch word koekje or koekie meaning “little cake.” You say biscuit, I say cookie ... let’s have a nice cup of tea and a sit down.

Digestive biscuits are like graham crackers -- light in texture, slightly grainy, and not-too-sweet. One of the ingredients is sodium bicarbonate -- baking soda to us plain folk -- and digestives were originally credited with having antacid properties, aiding the digestive process, and being good for people with “weak digestion.” Although one would think it’s all the nice whole wheat flour (or "wholemeal" according to U.K. ingredient lists) that’s good for the insides. Maybe they should have been called “digestible biscuits?”

I’m guessing the best-known digestive is made by McVitie’s, originally a Scottish biscuit maker, which started manufacturing digestives in 1892. They also make a chocolate coated digestive biscuit. I haven’t tried those yet, but apparently they are so popular that “... each year, 71 million packets of these are sold -- and each second 52 biscuits are consumed.” That’s one of the funnest statistics I’ve ever read! Fifty two biscuits per second.
I could easily consume numerous (although not 52) plain digestive biscuits in a single sitting with tea, milk, coffee, a mocha, or whatever is on hand. They go down easily, one ... after another ... after another ... after another ... They aren't available at our usual grocery store, but World Market carries McVitie's and Burton's (those are Burton's at the top of the post) and our local international grocer, Treasure Island carries them, too. A decent substitute is yummy Carr's Wheat Crackers, which seem like a grocery store standard.

Once smitten by store-bought digestives, naturally the next step was to find a recipe and make them myself. There is no shortage of digestive biscuit recipes, but which would be closest to McVitie’s?
First I tried this one from the King Arthur Flour company. They were delicious! And popular at home. But they were more like a light shortbread cookie and not crumbly enough so they missed the mark.

Take 1: A plateful of King Arthur Flour digestives. Light and sweet, but not quite the what I was aiming for.
Then I discovered the Great British Kitchen site, a wonderful place for recipes and other information about British food. Their recipe got me closer to the grainy, graham-cracker quality I like about McVitie’s.
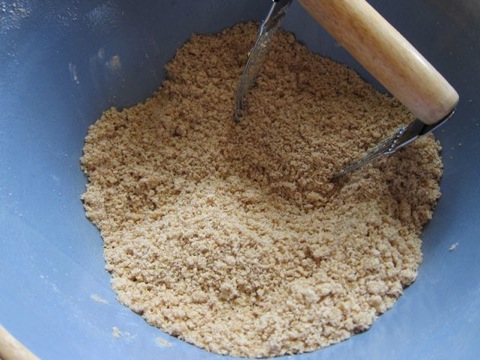
Digestives are as easy to make as sugar cookies, with ingredients you'd likely have on hand. These required only one “special” ingredient: powdered milk. (SHUDDER.) When I was growing up we drank gallons of the stuff. I, for one, didn't enjoy it. However, it was economical for a family of 12 and it was plentiful at the grocery store. Nowadays I don't imagine there's the same demand for powdered milk, so it’s hidden on the bottom shelf of the hot-chocolate-and-Coffee-Mate display. And it costs $9 a box! What would I do with four pounds of instant nonfat dry milk? Likely have post-traumatic powdered-skim-milk-drinking nightmares about it. How my brother grew to 6'3" after a sucking down that pale watery brew throughout his formative years is beyond me.

The recipe calls for just two tablespoons of powdered milk (I'd be manufacturing digestives for the rest of my life with that 4-pound box), so I substituted plain malted milk powder. I usually have plain and chocolate varieties on hand, for chocolate malted milk, pre-workout smoothies, and the occasional Chocolate Malted Milk Cake. As far as I’m concerned the plain flavor was the right substitute for powdered milk.

Take 2: Light, crisp, toasty, a little grainy, not-too-sweet ... perfect!
Next time I'll show you how I used my leftover King Arthur Flour digestives (the shortbready ones), along with the store bought kind, to make the now-famous no-bake Chocolate Biscuit Cake requested by Prince William for the most recent royal wedding. Swoon. No, no, not for the prince ... for the cake of course!
Digestive Biscuits
From the Great British Kitchen
Serves: 36
300 Gram Plain wholemeal or whole wheat flour (10 oz)
4 Tablespoons Wheatgerm
1/4 teaspoon bicarbonate of soda (baking soda)
1/4 teaspoon salt
2 tablespoon skimmed milk powder
4 tablespoon sugar
125 grams butter (4-1/2 oz)
5 Tablespoons cold water
1 teaspoon vanilla extract
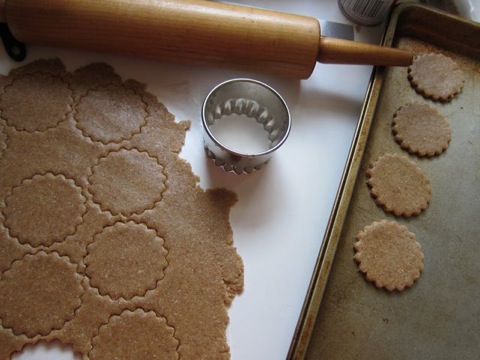
Combine the dry ingredients, then cut in the butter with a pastry blender or two knives until the mixture resembles breadcrumbs. Combine the water and vanilla and drizzle over the dry mixture. Blend until the dough can be packed together.
Roll out between two sheets of waxed paper until the dough is about 3 mm (1/8 inch) thick (yes, I measured it!).
Cut into circles or other shapes and bake on a greased baking sheet at 325 °F (170 °C, Gas 3) for 20 to 25 minutes. They should not be too brown. Cool on a wire rack and store in an airtight container.
Salmon with watercress sauce.
It’s no surprise that countries surrounded by ocean and streaked with freshwater rivers and streams count seafood as a culinary staple. Through poems, fairy tales, history books and movies, I have come to associate fish like cod, mackerel, haddock, herring and flounder with Merrie Olde England. 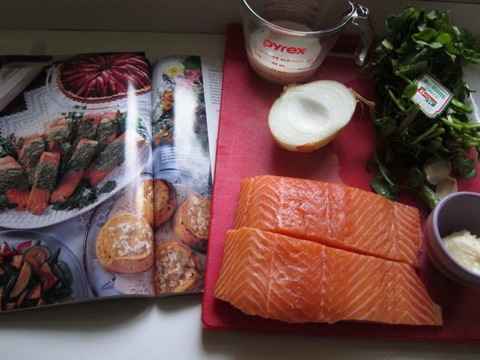
But the fish that shows up most commonly in my British cookbooks and magazines is rosy salmon, which looks and taste delicious no matter how it's prepared. And it’s almost always draped in sauce or dolloped with mayonnaise made beautifully green from rocket/arugula, parsley, watercress, sorrel, spinach or some other green leafyness.

According to the Scottish Salmon Producers' Organization, salmon is the U.K's most popular fish ordered in restaurants and purchased by consumers for preparing at home. The site also emphasizes how all those Omega 3's in salmon (up to 5 grams in an 8-oz. fillet) "help to develop and maintain our eyesight ... and conditions such as schizophrenia, attention deficit and hyperactivity disorder (ADHD) and even protect against sunburn, strokes and some types of cancers, as well as positive effects on the immune system and in mitigating the symptoms of arthritis." Protect against sunburn? Count me in! They do have some tempting salmon recipes, especially that Salmon Omelette. But wait -- don't leave yet ... there's more here.
We love salmon, so recently I picked a recipe with sauce made from watercress and cream out of my favorite "The Romance of Ireland" issue of Bon Appetit from May 1996. (It will take me a good long time to experiment with all the tasty recipes in that edition.) This recipe, like so many from this issue, is not available at the Bon Appetit site so I'm including it below.

The recipe couldn't be simpler, with a whopping five ingredients in all: butter (yum!), shallots, watercress, whipping cream, and salmon fillets. As usual, I did some skimping: in lieu of shallots I used up half an onion from the veggie drawer, and substituted a combo of evaporated milk and half-and-half for the whipping cream.

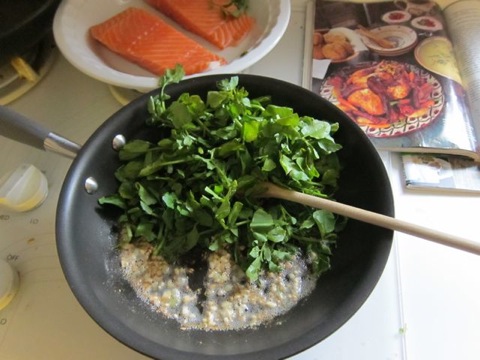
Butter lover that I am, I'd rather have the butter called for in the recipe than the fat and calories from whipping cream. In some cases. The recipe is meant to serve 8, but I was able to easily halve the sauce recipe and cook up just two salmon steaks. Even for 8, this wouldn't take much time or effort and requires minimal prep -- mincing shallots (or onions), a small amount of watercress trimming, then sauteeing, blending, and poaching (or broiling, grilling, I opted for frying) the salmon.
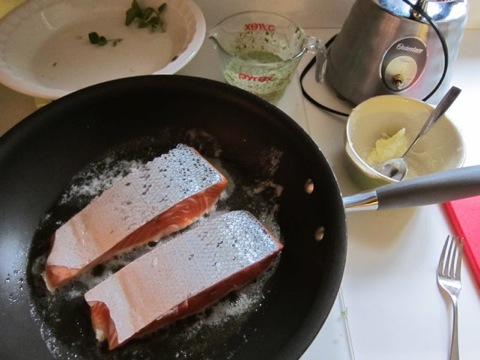
I was craving the golden color and crispiness that frying (in a combo of butter and olive oil) lends to the salmon, but in the future I might opt for the healthier method of poaching or grilling. Salmon doesn't take long to cook, even these fat fillets. You can cook them until just done, then let them finish cooking on a plate so they'll be perfectly moist and tender. Oh my mouth is watering just thinking about it!

The sauce was bright and fresh, both in color and flavor, and complemented the salmon beautifully. We had lots of leftover turmeric-tinted rice with peas from the Chicken Tikka Masala prepared earlier that week, which made for a colorful and dee-licious early summer dinner with chilled white wine. Lately we've taken to gulping down glasses of Three (formerly Two) Buck Chuck from Trader Joe's. We are always on the lookout for wine bargains, but we feel like we're stealing this stuff. Our wine rack is full! And we're happily wine buzzed. Now, Evanston, when the heck are you going to open a Trader Joe's here??

Salmon is so pretty.
Salmon with Watercress Sauce
From Bon Appetit, May 1996 "The Romance of Ireland" issue
Serves 8 (but halves nicely)
4 tablespoons (1/2 stick) butter
1/2 cup finely chopped shallots
2 large bunches watercress, tough ends trimmed
1-1/2 cups whipping cream
8 8-ounce salmon fillets with skin
Melt butter in heavy large skillet over medium-low heat. Add shallots and saute until beginning to soften, about 3 minutes. Add watercress and stir until wilted and still bright green, about 3 minutes. Add cream. Increase heat to high and bring to boil. Remove from heat. Puree hot sauce in blender until almost smooth. Transfer to heavy small saucepan. Season with salt and pepper. (Can be made 8 hours ahead. Refrigerate.)
Butter 2 steamer racks and place in 2 large saucepans over simmering water. Season salmon fillets with salt and pepper. Place salmon, skin side down, on steamer racks. Cover saucepans and steam until salmon is just opaque in center, about 10 minutes.
Whisk sauce over low heat to re-warm. Transfer salmon to platter. Spoon some of the sauce over salmon. Garnish with additional watercress. Serve, passing remaining sauce separately.
Enjoy!
And please please feel free to leave a comment below, whether you are friend or foe. Let's talk about food!
Chicken Tikka Masala.
Chicken Tikka Masala sits atop a culinary tree sprouting from a one simple word: tikka. In Hindi, it means "bits, pieces." From there, it grows to "chicken tikka" -- chicken marinated in seasoned yogurt and broiled in a clay tandoor (or a really hot oven). One can conclude that either pieces are marinated and broiled, or the cooked chicken is cut into pieces. And finally, Chicken Tikka Masala is those bits and pieces of broiled marinated chicken simmered in a tomato-based sauce seasoned with aromatic Indian spices such as coriander and garam masala. Sound good?Behold!

What, you ask, does this Indian dish have to do with that little British flag at the top of this blog post? Well, like Kedgeree, Chicken Tikka Masala (henceforth "CTM") comes together as a sort-of hybrid of British and Indian cuisines, and its exact origins are sketchy. Some say it was created in Punjab sometime in the past 50 years, while others believe it came about -- some say in Glasgow, some say in 1970's London -- when a Brit decided his chicken tikka was too dry and "demanded" some British-style gravy to go with it. The annoyed Indian chef, so the tale goes, mixed Campbell's tomato soup with spices and yogurt to create a creamy, fragrant tomato sauce that, when mixed with chicken tikka, would go on to become one of Britain's most popular restaurant dishes.

I discovered CTM only recently and was curious to find out how easily makeable it was. My first attempts to make Indian food were inspired by my purchase of The Vegetarian Table: India by Yamuna Devi. That was probably inspired by my then 8-year-old son's decision to become a vegetarian. He was earnest in his desire not to eat animals (it was a revelation to learn bacon was meat, let alone that it came from pigs), so I bought a few vegetarian cookbooks, including one specifically geared for kids.

In truth, after a week or so his craving for meat revisited him, and although he hopped back on the veggie bandwagon a few times -- wrestling with the animal flesh issue -- he has made peace with being a carnivore. But it was fun going through the books and coming up with ways to keep meat out of our meals. I donated most of the veg cookbooks (but kept Simple Vegetarian Pleasures by Jeanne Lemlin -- it's a good one), and truly regret not hanging onto that Indian cookbook (although I see it for $1.90 at Amazon!).

At the time I found Indian food UNBELIEVABLY TIME-CONSUMING. I made one Indian meal for the two other single moms and their kids who lived in our building, and I swear it took me three days from start to finish, what with sauteeing spices, marinating things in yogurt, seeding jalapenos, chopping fresh fruit, toasting sesame seeds and so on. Indian women must be absolute masters at engineering the advanced prep that goes into cooking for their families. I salute them. The meal I made was delicious (if I say so myself), but I was utterly spent afterward and vowed I would thenceforth eat Indian food only in restaurants.
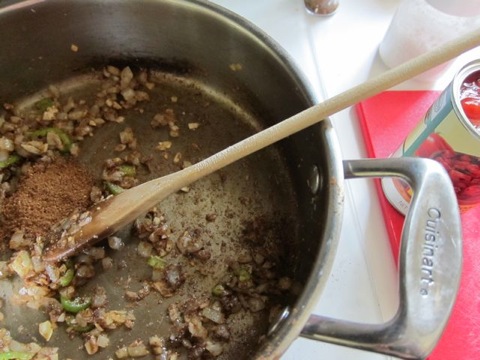
Chicken Tikka Masala won't take you three days to cook, I promise. It's not exactly fast food, but if you buy garam masala (yes I made mine, lo those many years ago -- pan-toasted the spices and ground them up in an old coffee maker--took some time but good golly it smelled amazing!) and don't aspire to anything so slow-food as slaughtering your own chickens and culturing yogurt from scratch, it shouldn't take more than a few hours on a weekend afternoon. If you're ambitious, you'll have time to slip a batch of naan in there too.

The absolute best part of cooking CTM is frying the fragrant spices until your kitchen, nay your entire house, smells so heady and heavenly you'll think you died and went to Delhi. Then it only gets better when you add tomatoes, spicy peppers, tomato paste or sauce, and a bit of cream. You'll want to eat the air above your stove.

The yogurt-marinated chicken breasts broiled quickly and very nicely in the oven. It's a poor substitute for an actual tandoor, 'tis true, but one makes do with the tools at hand. When the broiled chicken pieces cool, cut them into tikka cubes.
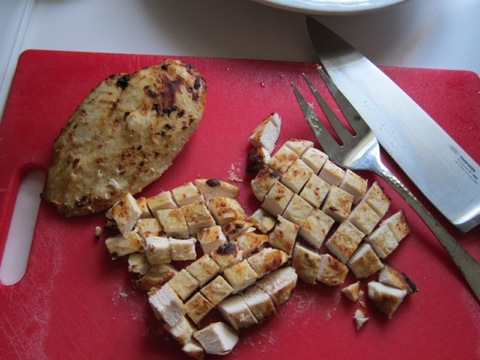
There are so many versions of CTM, each just slightly different from the next, and it was hard choosing one. I finally combined a recipe from Pioneer Woman's site (actually a guest post from the VERY cool Pastor Ryan) with one from Mrs. Wheelbarrow (how fun is that name!). I do that. Sometimes I faithfully follow a recipe, especially when it involves the chemistry of successful baking. But with cooking, I tend to tinker a bit -- tweaking this, adding that, omitting this, increasing that to suit my tastes. Since there doesn't seem to be a definitive CTM recipe, I'm not worried about being authentic and did make some minor adjustments to the two combined recipes.

The Pioneer Woman/Pastor Ryan recipe includes directions for gorgeous golden turmeric rice with a cup of frozen peas. I cut the amount of turmeric down to two teaspoons and feel I could have gone down even more. A subtle gold colored rice, instead of blazing yellow, would have been equally appetizing, I think.

Add a plate of buttered (my favorite!) freshly pan-cooked naan -- the recipe I used doesn't require activating yeast or proofing the dough (well sort of -- you let it sit for two hours but it doesn't really rise), and you just might believe you're at your favorite Indian restaurant. Or somewhere in London or possibly Glasgow.
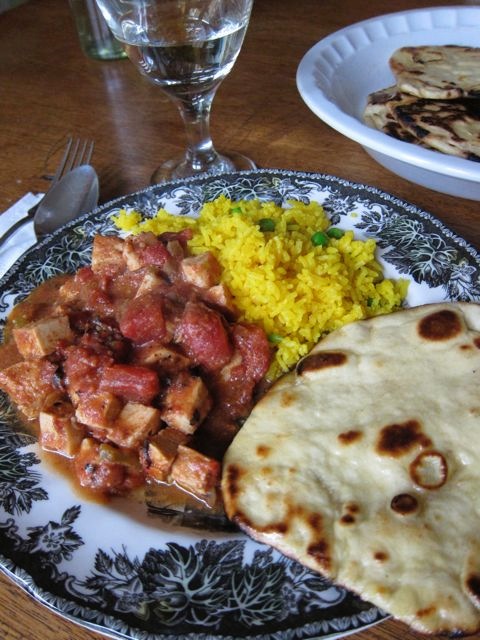
Britain's Food Service Intelligence (like the CIA for food? ) reports that Chicken Tikka Masala is the most popular dish ordered in restaurants throughout the U.K. And the late Robin Cook, a British Member of Parliament, proclaimed in 2006 that "Chicken Tikka Masala is now a true British national dish ... it is a perfect illustration of the way Britain absorbs and adapts external influences. Chicken Tikka is an Indian dish. The Masala sauce was added to satisfy the desire of British people to have their meat served in gravy." I'm not clear on whether everyone agrees with Cook that CTM should usurp, say, roast beef with Yorkshire pudding as a national culinary treasure, but it sounds like a lot of people are eating it over there.
For hoots, check out the Little People Project's whimsically weird "Chicken Tikka Disasta."
Chicken Tikka Masala
Serves a small crowd, or 2 for several days running
3-4 chicken breasts
Kosher or other sea salt
Ground coriander
Ground cumin
1/2 cup plain yogurt
1 Tablespoon lemon juice
2 Tablespoons butter or canola oil
1/2 large white or yellow onion, chopped
3 cloves garlic, minced
1 2-inch knob fresh ginger, peeled and grated
2-3 teaspoons garam masala, or more to taste
2” piece of warm/hot (but not scorching) chile pepper, such as Anaheim, sliced thinly
1 28-ounce can diced tomatoes OR for creamier sauce 1 14-oz. can finely diced tomatoes plus 1 14-oz. can tomato sauce
1-2 Tablespoons sugar
1-1/2 cups light cream, skin evaporated milk, or fat free half-and-half (use heavy cream if your doctor has advised you to get more fat in your diet)
2 cups basmati, jasmine rice or other rice
1-2 teaspoons ground turmeric
sprinkling of salt
1 cup frozen or thawed green peas (optional)
Chopped parsley or cilantro (otional)
Make chicken: Sprinkle chicken breasts with ground coriander, cumin, and small amount of kosher salt on both sides. Stir lemon juice into yogurt and mix thoroughly. Brush over both sides of chicken breasts and let sit snuggled together in a pie plate for 30-60 minutes. (Good time to start chopping veggies.) Transfer to foil-lined baking pan and set about 10-12 inches below broiler heat/flame. Cook completely on both sides, allowing them to char and bubble a little. Keep an eye on them! Remove from oven and set aside to cool. Once cool, cut into bite-sized cubes.
Make sauce: While chicken is cooling, heat 2 tablespoons of butter or oil in a large skillet. Add onions and sautee until lightly browned. Add garlic, ginger, garam masala, and sliced chiles. Stir together for a minute or two. Pour in the can of chopped tomatoes, or tomatoes plus sauce, and 1 Tablespoon sugar. Simmer for about 5 minutes, then taste to see if it needs the other tablespoon of sugar. (You don’t want it sweet, but the sugar can balance the spices and heat of the chile.) Add cubed chicken to sauce and let simmer over low heat while you finish up everything else.
Make rice: in a large sauce pan add rice, a dash of salt ,1-2 teaspoons of turmeric (depending on how yellow you want the rice to be) and recommended amount of water (probably around 4 cups). Cook according to directions for the rice you are using. When rice is almost done, toss in a cup of frozen or thawed peas. This makes a lot of rice, but we found it to be just right for the amount of leftovers.
Serve hot Chicken Tikka Masala over or next to the lovely green-pea-studded golden rice along with warm naan. Cheers!
As always, feel free to leave a comment below.
Kedgeree.
Monarch of the Glen, a BBC series filmed in the dreamy Scottish Highlands, introduced me to a strange new word: “kedgeree.” It was a dish the show’s characters -- the once wealthy but nearly bankrupt MacDonald family -- occasionally enjoyed at their mannerly breakfasts alongside tea, toast, jam and cream. But I couldn't figure out what they were spooning out of that silver chafing dish! Kedgeree was some weirdly named mystery.
I finally took to the web and learned that kedgeree (kedge-er-ree), according to the British Food Trust (and many other sources), consists of poached fish -- traditionally, smoked Findon (a Scottish fishing village) haddock known as “Finnan haddie” -- mixed with rice, butter, chopped hardboiled eggs, curry powder and parsley. It is thought to have evolved from the Indian rice-and-lentil dish khichdi (pronounced kitch-ri), possibly during the period of British colonial rule in South Asia known as the British Raj. Its association with Scotland originates with the belief that a Scottish regiment brought a version of the dish with them to India, where it evolved under Asian influence and was returned to the U.K. with exotic additions such as curry, fresh ginger and hot green chile. I'll let those who know the truth duke it out over kedgeree's true origins, but its Anglo-Indian history cannot be disputed: curry is definitely not a native British flavoring.

Until recently, you could not get me anywhere near smoked fish -- smoked anything -- let alone eating fish of any kind for breakfast. I’m a devoted high-fiber-breakfast-cereal-with-milk girl, willing to eat toast, eggs, fruit, french toast, pancakes or whathaveyou when mid-morning hunger sets in on the weekends.

But episodes of Monarch -- featuring deep blue Scottish lochs, rolling green Highland hills, misty moors, rustic stone crofts, a few kilts, some Scottish burr, occasional bagpiping, and the opulent 19th-century Glen Bogle estate -- made me homesick for the motherland-I've-never-seen and sparked my willingness to try kedgeree. Plus, just looking at all that brisk Highland air makes me hungry! If my British ancestors ate haddock for breakfast, then so shall I.
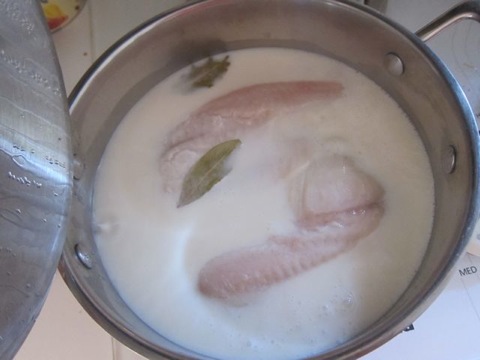
Alas, smoked haddock is not a standard grocery item in these parts, and mail ordering it is not for the thin of wallet -- a whopping $23 per pound, with shipping, for fillets imported from Scotland. Ach, cannae do it. So for my first kedgeree attempt I settled on a pound of more budget-friendly tilapia fillets, but for future versions I’ll try a combination of smoked ($$!) and fresh (not as $$) salmon, or whatever fresh fish looks good and is reasonably bone-free, until I can find those authentic Finnan haddies without having to peddle family heirlooms on eBay.

Recipes for kedgeree range from mild to fancy (three kinds of salmon!) to fragrantly seasoned with cumin and heady garam masala. It calls for hardboiled eggs, but I cheated and whipped up two poached ones -- they're a bit faster.

I started with Jamie Oliver’s recipe, because, well check out the photo at his site. It's so appetizing! He had me at those pretty slivers of spicy red pepper and flecks of mustard seed. But of course I had to make a few wee changes, so my modified recipe is below. For example, I halved the curry powder to keep it from overwhelming the dish, added green onions, used a spicy green Anaheim pepper (couldn't find a red one), and used butter in place of butterghee, which requires a trip across town (file under "laziness").
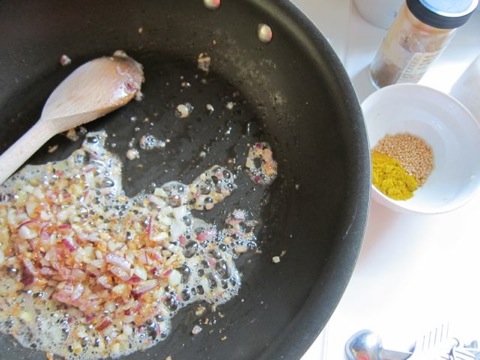
And instead of including steps for cooking the eggs and rice, I’m including those as already prepared ingredients. Both can be easily boiled up while you are chopping, measuring and poaching, but the whole thing comes together pretty quickly if you’ve made them in advance. I also added a few tablespoons of the poaching milk at the very end, to moisten things up and give it just the slightest creaminess.
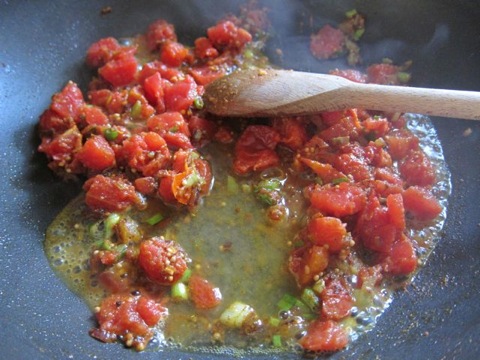
If you’re hip to smoked salmon for brunch (with or without bagels, onions, cream cheese and capers) you’re already used to fish in the morning, and now I'm hooked, too. Kedgeree is lovely any time of day -- it's light enough for a summer morning yet satisfying on a cold, rainy afternoon. The recipe can be easily tinkered with so add more curry or garlic, less onions, a cup of peas, a dash of nutmeg, some garam masala, more eggs, no eggs, more heat, no heat -- whatever strikes your fancy.

Isn't it pretty? I promise you it tastes as good as it looks. The final word(s) is that kedgeree is versatile, easy to make and delicious comfort food that is truly suitable for any meal of the day. I know this because we ate it for breakfast -- or, more accurately, “second breakfast” -- and dinner. On the same day. And would have had it for dessert if there had been any left.
Kedgeree
Adapted from Jamie Oliver
Serves 6 (or in our case, 2, twice)
1 to 1-1/2 pounds smoked haddock (traditional)
OR your favorite fish (try salmon, trout, tilapia), smoked ... or not
2 bay leaves
Milk (skim or 2%)
3-4 tablespoons butter
1” knob of fresh ginger, peeled and grated
1/2 medium onion, finely chopped (or more, if desired)
1/2 bunch of green onions, sliced (white and light green parts only)
1 clove garlic, peeled and minced
1 Tablespoon yellow curry powder (add more or less, to taste)
2 teaspoons yellow mustard seeds
1 14-oz. can chopped tomatoes, drained
OR 2 fresh tomatoes, chopped and seeded
Juice of 1 lemon, about 1/4 cup
1/4-1/3 cup chopped fresh parsley, cilantro, or arugula
1 fresh red or green hot chile, half of it chopped and half slivered
(optional)
2-3 hard-boiled (or poached) eggs, cooled, peeled and chopped into
quarters or eighths
3 cups cooked long-grain, basmati or brown rice (from 1 cup uncooked rice)
Place fish into a saucepan or sautee pan with the bay leaves, and pour in just enough milk to cover the fish. Bring to a boil, then cover and simmer for about 5 minutes or until cooked through. Remove fish from pan with spatula or slotted spoon and cool on a plate or pie pan. Once cool, remove skin (if necessary) and flake fish into chunks; set aside. Reserve poaching milk.
Melt 3 tablespoons of butter in a sautee pan over low heat. Add ginger, white onion and garlic. Sautee until soft, about five minutes. Add green onions, curry powder and mustard seeds, and sautee a few minutes more. Add chopped tomatoes and lemon juice; stir until mixed. Add flaked fish and rice to the mixture and heat through, stirring gently but thoroughly. Mix in the eggs, parsley and the chopped hot chile to taste (omit if you don’t want a spicy dish). Add a few tablespoons of the reserved poaching milk to moisten the mixture and add some creaminess.
Serve on plates or in bowls; top with slivers of chile and sprinkles of parsley.
Thanks for stopping by, and please feel free to leave a comment.
Scotch eggs ... not for the faint of heart.
Scotch eggs, the sausage-wrapped-breaded-fried-hardboiled-eggs that are a staple on English (and Scottish, if my casual online research serves me) pub menus, have nothing to do with Scotch and apparently do not hail from Scotland. Their invention is commonly attributed to Fortnum & Mason, the stalwart 300-year-old English grocer-to-the-royal-family famous for their wicker hampers filled with wines, teas, scones, olives, crackers, cookies, fruitcakes, teacups and chocolates. (I want one of those hampers! I'll take this one. Or this one. Or this ... EGADS. I just checked the pounds-to-dollars exchange rate! Fine, I'll settle for this one.)
Anyway, Scotch eggs ... the story goes that back in 1738 (or by some accounts 1851), a clever foodie at F&M wrapped small hard-boiled pullet eggs with ground meat or sausage -- possibly Scotch beef (that would be beef from those big, furry, redhaired Scottish highland cows) -- fried it up, and declared it fit for a picnic in the country. Indeed, Scotch eggs would be ideal for picnicking -- they are good* warm, cold or room temperature, pack easily and travel well. *Understatement of the year.
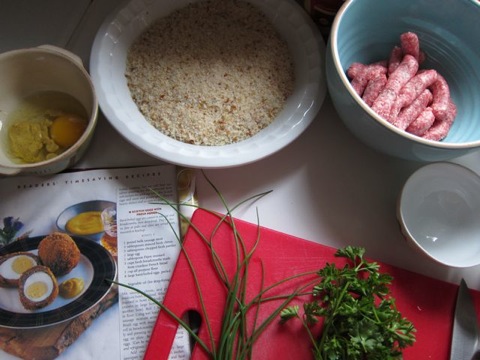
Scotch eggs may have been inspired by a North Indian dish called Nargisi Kofta, a similar meat-wrapped-egg (with meatless variations) floating in a sauce spiced with cinnamon, cardamom, ginger and garlic, although I'm sure the recipe varies widely from one Indian kitchen to the next. Considering how long England has been associated with India, some recipe borrowing was inevitable but Scotch eggs are simple, hearty fare and not exotic -- all the recipes I've seen call for the same combination of eggs, sausage, herbs and breadcrumbs, with no aromatic vestiges of their supposed Indian ancestry.
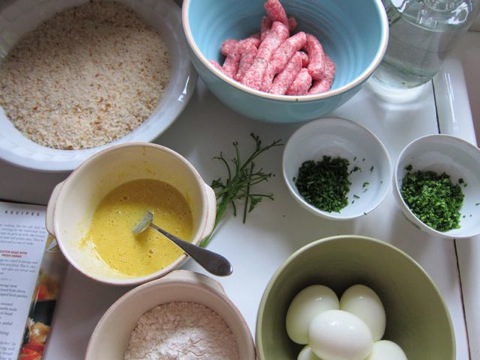
This recipe comes from my other favorite Bon Appetit -- the May 2004 "A Taste of Scotland" issue. I think they grossly erred when placing it under the section called "Too Busy to Cook? Quick and easy favorites from Scottish readers." Quick? I don't think so! Easy? Well sure, but this is not a dish one throws together on a whim, unless you've already boiled/cooled/peeled the eggs, blitzed the breadcrumbs in a blender, chopped the herbs, squished them into the sausage, and set up your fryer.
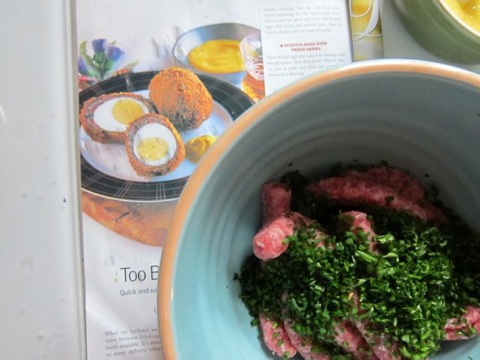
Yes, those are sausage links in that bowl because our favorite brand -- Johnsonville -- didn't come in one of those handy tubes, and yes I pulled each one out of its filmy little casing so it looked like I had a pile of miniature condoms on the counter. And I didn't bother taking a picture because no one wants to see that.
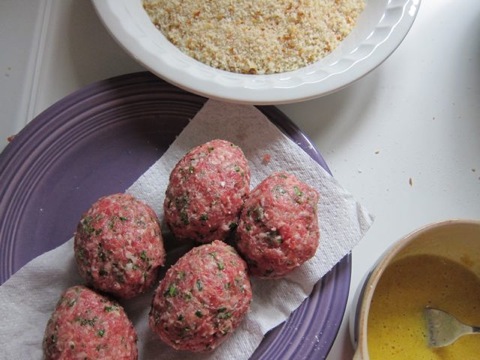
Assembly is easy, but not exactly zippy: roll an egg lightly in flour, work a blob of herbed sausage around it to coat completely, brush with an egg/mustard mixture, roll in fresh breadcrumbs, and lower into hot oil.

Tip: wrangling a camera with flour, sausage and breadcrumbs on your hands in order to get good pictures for your blog is tricky at best, so not photographing the process will save you lots of time and multiple handwashings.
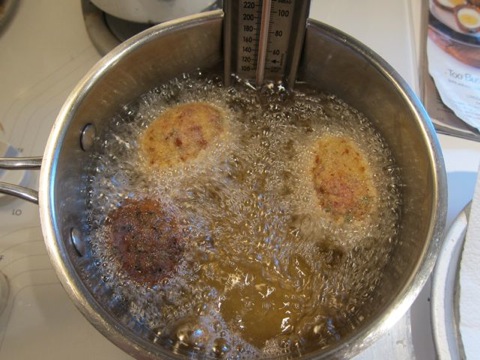
I rarely fry foods, but found it was quite painless and not even that messy, especially with the hood fan sucking up those hot oil vapors (although, oddly, the house still managed to smell like fried fish throughout the day). With a thermometer in the pan, I was able to keep the oil temperature just about right so each egg took the allotted 5-6 minutes to fizz to a nice deep brown. After a brief rest on some paper towels, they were sliced in half and served with mustard, ketchup and cold beer, alongside apple slices and carrot sticks to give the

Oh my stars and garters, they were really REALLY good!** And hard to resist. Munching on them fresh(ish) out of the fryer, with a cold Smithwick's close by, I had to restrain myself after two. I'm pretty sure it was only two. **Extreme understatement of the year.

I could have kept eating them with no regard for my waistline or the state of my arteries. I hope we had the good sense to have a big salad for dinner, but all I can remember about that entire day, foodwise, was these eggs.

Look at that. Two left! I confess it took my entire supply of willpower to save them for others in the house.
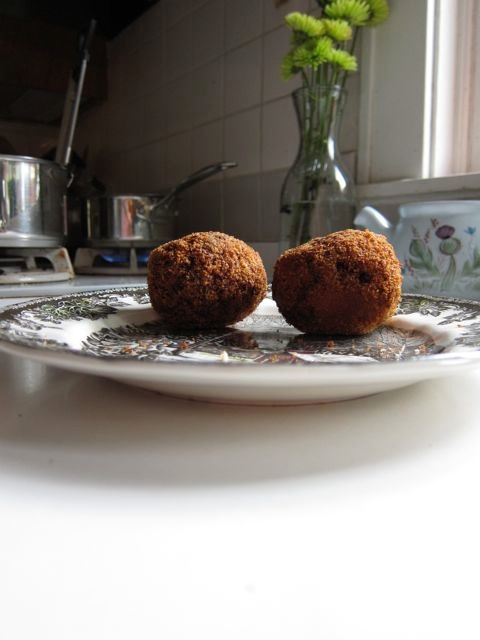
I don't give a hoot about the nutritional shortcomings of deep-fried-sausage-eggs. If I have anything to say about it, those things won't last past the weekend.
Their English pedigree notwithstanding, Scotch eggs are, I am confident, enjoyed by the Scottish, too. And possibly the Irish. Maybe even the Welsh! I found the "receipt" in several of my own cookbooks including Favourite Scottish Recipes and Celtic Folklore Cooking, as well as in the The Scottish-Irish Pub and Hearth Cookbook. But to get your tastebuds together with a Scotch egg sooner than later, I've included the Bon Appetit recipe below. You can thank me later -- when your personal trainer gets through with you.
Scotch Eggs with Fresh Herbs
From Bon Appetit -- May 2004 "A Taste of Scotland" issue
Makes 6 (note that doesn't say serves 6)
1 pound bulk sausage meat
3 tablespoons minced fresh chives
3 tablespoons chopped fresh parsley
1 large egg
1 tablespoon Dijon mustard (or your favorite mustard)
5 cups fresh breadcrumbs made from crustless French bread
(this is way too much -- 2-1/2 cups is more than plenty)
1 cup all-purpose flour
(this is also more than necessary -- 1/2 cup is quite enough)
6 large hard-boiled eggs, peeled
Vegetable oil (for deep-frying)
Mix sausage, chives, and parsley in medium bowl to blend. Whisk egg and mustard in bowl to blend. Place breadcrumbs in large bowl (or pie plate). Place flour in another bowl. Roll 1 hard-boiled egg in flour. Using wet hands, press 1/3 cup sausage mixture around egg to coat. Brush egg with mustard mixture, then roll in breadcrumbs, covering completely and pressing to adhere. (Repeat egg/mustard mixture and breadcrumbs for extra breading.) Place coated eggs on plate. Repeat with remaining eggs. (Can be made 1 day ahead. Cover and refrigerated.)
Add enough oil to heavy large saucepan to reach depth of 1-1/2 inches. Attach deep-fry thermometer and heat oil to 325 degrees Fahrenheit. Add 3 prepared eggs to oil; fry, turning occasionally, until sausage is cooked through and coating is deep brown, about 6 minutes. Using slotted spoon, transfer eggs to paper towels to drain. Repeat with remaining 3 eggs. Serve warm with mustard, ketchup, or other favorite condiments.
As always, feel free to leave a comment -- but preferably not a note from your physician advising you to stay away from this blog -- below.
Leek and Potato Soup.
Our springtime weather has been a bit erratic -- spells of rainy, shivery days broken by a day or two so unseasonably hot it feels like July, then back to March-like cold and wet. It's probably not unusual for the midwest, but it gets a mite tiresome. 
Cooking is a cozy antidote for crummy weather, and potato leek soup makes sense in spring when it's chilly enough for warm comfort food that is satisfying but not heavy. This soup recipe comes from my well-thumbed May 1996 "The Romance of Ireland" edition of Bon Appetit magazine. It doesn't appear at Bon Appetit's site so I'm including it at the bottom of this post.

I'm usually hesitant to buy leeks -- they are fairly expensive when you do the math. Not too bad at $2.49 a pound, but considering you chuck exactly half of what you've purchased into the trash (or compost heap), to my penny-pinching mind that doubles the cost. Leeks must have been cheap and plentiful at some point in history, and they seem to be universally paired with potatoes. The Scottish put them into Cock-a-Leekie (chicken and leek) or Tattie-and-Leekie (potato and leek) soup, and the Irish in Leek-and-Potato. The Welsh regard leeks so highly that they have become a national symbol of Wales. On the feast day of Wales' patron saint, St. David (who was poor and pious and thought to eat not much more than leeks and water), leeks (very small ones!) or daffodils are worn in the lapel to demonstrate national pride, and leek soup, called "Cawl Cymreig" (Welsh Cawl) is traditionally served.
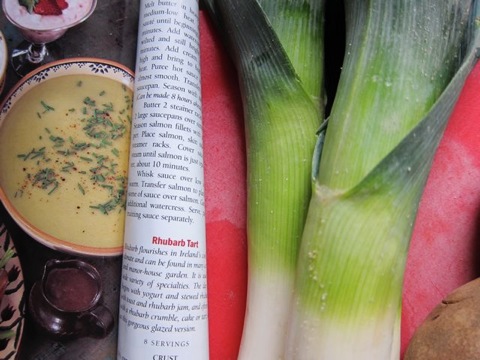
It sure sounds like they consume a lot of leeks across the Atlantic, so I couldn't help but wonder what they're paying for them. A quick online check of Superquinn, an Irish grocery store chain, shows they’re in no better shape (by my budgetary sensibilities) over there -- $2.70 per pound, if I’m converting my Euros to Dollars and kilograms to pounds correctly.

Unlike leeks, potatoes as a pantry staple make good food sense -- abundant (except for that tragic time in Ireland in the mid-1800s), filling and inexpensive, it's small wonder they are added to so many dishes around the world. Their cost notwithstanding, leeks -- and the humble potato -- live strong in the native cuisine of my overseas brethren, and I stand with them. So on with the soup!

Like many creamed soups, this one is easy but a bit labor intensive. First, there's cleaning the ubiquitous grit and dirt out of the leeks. Then there's peeling, chopping, more chopping (and a little weeping, if you’re sensitive to onions -- I am) ...

... sauteeing, boiling, blending, scraping, pouring, more blending ...
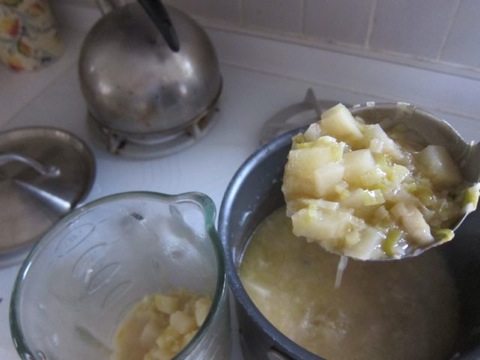
... and wrangling batches of blended soup with bowls, rubber spatulas and such. Creamed soups sound so easy, but in my kitchen they generate a bit more mess.

However, may I say the result is silky smooth and delicious, with no cream -- high-fat or otherwise -- to give it creaminess. Seasoned only with salt, pepper and a sprinkling of chopped chives fresh from our spring garden, it tastes both simple and indulgent. I imagine pre-blender versions were chunkier and more rustic, but no less delectable. The recipe calls for butter and chicken stock, but canola oil and vegetable stock can be substituted for a completely meat-free version.
Luckily we had leftover Irish brown bread (so cinchy to make, from the same issue of Bon Appetit) in the freezer, which I toasted and served with a simple green salad and Smithwick's. Beer might be too sturdy a libation alongside this light creamy soup, but is that reason enough forego? If you have no Smithwick's, white wine will complement the meal nicely.

Leek and Potato soup is also good chilled, so don't let rising temperatures keep you from enjoying this lush and lovely soup. It's nice to have options when the darned weather can't make up it's mind. Slainte!*
Leek and Potato Soup
From Bon Appetit, May 1996 "The Romance of Ireland" issue
4 servings
3 tablespoons butter
3 large leeks (white and pale green parts only), halved lengthwise, thingly sliced (about 4-1/2 cups)
2 large russet (baking) potatoes (about 18 ounces total), peeled, diced
4-1/2 cups (or more) chicken stock or canned low-salt broth
Melt butter in large heavy saucepan over medium heat. Add leeks; stir to coat with butter. Cover saucepan; cook until leeks are tender, stirring often, about 10 minutes. Add potatoes. Cover and cook until potatoes begin to soften but do not brown, stirring often, about 10 minutes. Add 4-1/2 cups stock. Bring to boil. Reduce heat, cover and simmer until vegetables are very tender, about 30 minutes.
Puree soup in batches in blender or food processor until smooth. Return to saucepan. Thin with additional stock if soup is too thick. Season with salt and pepper. Ladle into bowls, garnish with chives and serve.
*A common toast in Ireland and Scotland meaning "Health!" Pronounced SLAWN-cha.
As always, please feel free to leave a comment below. I love hearing from everyone!
Chocolate Victoria Sponge. Or What To Make When Your Cooker Blows.
After making Treacle and Spice Victoria Sponge, I vowed to make the chocolate version next. And I did. And it’s delicious! And easy to make so don’t pass this one up. 
Important reminder: "sponge" = cake.
According to Wikipedia, and a number of Victoria Sponge cake bakers I’ve visited around the internet, Victoria sponges -- because of their sensitivity to cooking times and temperatures -- are baked by oven manufacturers to test their ovens. Maria at Squirrelslarder, from whom I took this chocolate sponge recipe, relates that the British gas board took this culinary measure after her family’s cooker breathed fire upon her mum, vaporizing a bit of her hair. To make sure repair to the gas lines and oven was satisfactory, the gas board ladies baked sponges. I can’t think of a more civilized way to salve the trauma of a malfunctioning oven than to serve up jam-filled cake and tea. It would not surprise me at all to learn that stress levels in the English are far lower than ours.

Anyway, don’t be put off by all the apparent sensitivities of Victoria sponge -- I’ve made two of them and although they were not taste-tested by authentically British folk, I can assure you they cooked up a treat and my family had no complaints. I am my worst kitchen critic and even I was most happy with the results.

One thing I love about these British recipes is weighing out the ingredients on my spiffy Escali digital scale. Maria's recipe does include ounce equivalents, which I think you could measure out with a measuring cup, to make your life a little easier. The only problem is my pans are too large -- 9+ inches instead of the required 8” so my two sponge layers are thinner than they should be. But no less tasty!
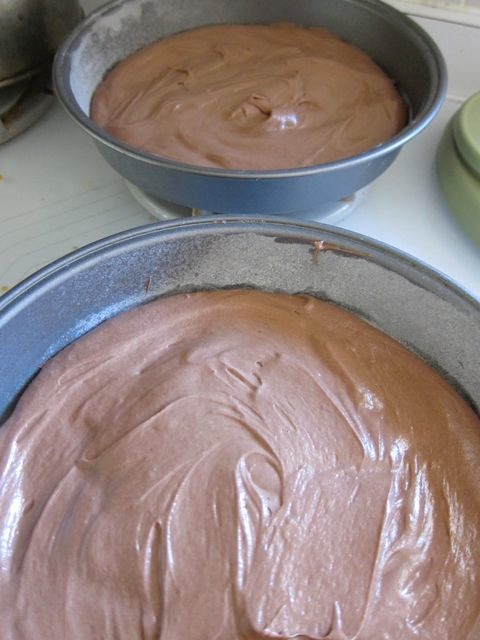

Although Maria includes a buttercream filling recipe, I happened to have leftover buttercream frosting, inspired by I Am Baker’s frosting rosettes, which I actually made from the frosting but have yet to blog about. The pretty rosettes actually are quite easy! Oh okay, here's a quick look at them. The cupcakes were strawberry (from the Cake Doctor cookbook) spread with a thin layer of chocolate ganache and topped with the rosettes. For Valentine's Day.

Where was I. Oh yes, I had leftover frosting -- from those very rosettes -- in the freezer. Freezers are fantastic, aren't they? Besides the obvious (ice, ice cream, ice packs) I use mine to preserve tortillas and sliced homemade bread, freeze bananas for smoothies, and save buttercream frosting for sponge cakes. I thawed the frosting and mixed in something like 3-4 tablespoons of Ghirardelli cocoa powder, which resulted in a chocolatey buttercream lightened and fluffed up from all the stirring.

I smoothed a thin layer of buttercream onto the first layer of sponge (the uglier layer) and spread that with homemade (not by me) cherry preserves. Then the second sponge layer, a light dusting of powdered sugar, and ....

Isn’t it pretty? And so simple! This just proves that really good cake does not have to be encased in a cloying armor of frosting. If you don’t want to buy or make buttercream, whipped cream will do and try a layer of your favorite jam or preserves.
The flavor of this sponge is somehow both light and rich (must be all that lovely butter) -- it’s not in-your-face chocolate like Devil’s Food, and almost reminds me of chocolate pudding.

Served with tea, of course. Or coffee and an episode of Doc Martin or Jewel in the Crown, both of which we happen to be watching at the moment.
Find the Chocolate Sponge recipe (and many other scrumptious treats) at Squirrel's Larder. Cheers!
As always, feel free to leave a comment below.
Cowboy cake: the family secret EVERYONE knows.
After making several references to "Cowboy cake" in my last post, I figured it's time to share the secret recipe for my family's favorite brown sugar spice cake. We've been enjoying cowboy cake for years, and it's time to go public with it so y'all can enjoy it, too. Yeehaw! 
Cowboy cake couldn't be easier: it stirs up quickly in one bowl with no expensive, rare or fancy ingredients (except for one very special and secret addition--stay tuned) or culinary maneuverings, baked in a regular ol' 9"x13" pan and topped only with a bit of streusel sprinkled over the batter before cooking. Once baked and cooled (if you can wait that long), it is easy to consume square after moist delicious square, especially if you have a glass of cold milk nearby. Put a plateful of humble cowboy cake on the table and my family will plow through it in a flurry of cinnamon-nutmeg flavored crumbs.
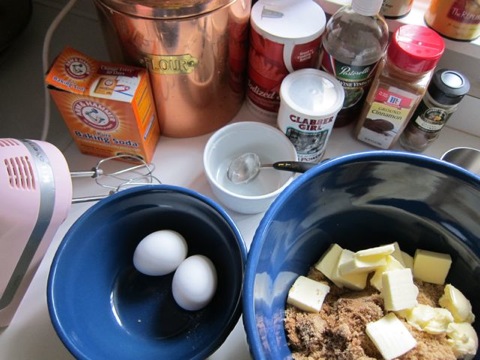
You probably have all the ingredients on hand for Cowboy Cake.
This is the cake we've always brought to summer picnics and family potlucks, and mom seemed to make it best. She charred many a chocolate chip cookie in her day, but she could have baked a perfect cowboy cake blindfolded. I felt like I'd joined the superspecial Cowboy Cake Club the first time I made one after moving into my own apartment. With that recipe in my then very small recipe box, it seemed I was in possession of a family treasure.

Butter is worked into a brown-sugar/flour mixture to create the batter base and crumbly streusel topping.
Then one day a few years ago I couldn't find the precious recipe. PANIC. How would I replace it? had the family secret died with mom? I turned to the internet, hoping I would find some hint of the recipe out there. After "cowboy cake" yielded only some cute cowboy themed birthday cakes, I hit on "cowboy coffee cake" and got 89,400 results (in 0.36 seconds, thank you Google). I was elated to find the exact recipe! But suddenly I realized ... this isn't a family secret at all. Dagnammit, EVERYONE knows about cowboy cake.


With a twinkle in her eye, mom loved revealing the secret ingredient in cowboy cake: vinegar. One tablespoon of red wine vinegar (or whatever you have in the pantry) mixed with a cup of milk sours it in just a few minutes and gives the cake just the slightest hint of tang. I'm sure pioneer women would have preferred straight up buttermilk -- a by-product of butter churning -- but I'm guessing souring milk was faster and a lot easier on the arms.

A wooden spoon and a pastry blender (or two knives) are just about all that's required for this cake, although our pioneer sisters might have had some fun playing with a girly pink electric handmixer.

A reserved half-cup of the brown-sugar/flour/butter base is sprinkled on the batter -- no frosting required!
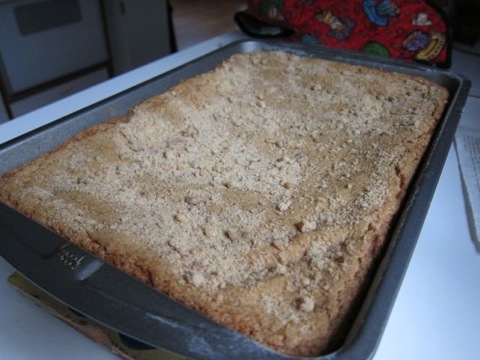
Cooks up the prettiest golden brown in about 30 minutes. OOPS. I'm drooling.

Believe me ... one slice will only whet your appetite for more. Remember to have cold milk, tea, hot coffee or whatever you fancy nearby. (Have I sufficiently played up the importance of cold milk here?) Camp fire and chaps optional. Naturally, I have to have a dollop of butter to spread on this cake. I'll need all that energy for driving

Git along, little dogies! Cowgirls like it too.
Cowboy Cake (also known as Cowboy Coffee Cake)
2-1/2 cups light brown sugar
2-1/2 cups flour
2/3 cup butter (slightly softened) or margarine (chilled)
1 T. vinegar, preferably red wine vinegar
1 cup milk (I use 2%)
2 eggs, beaten
2 teaspoons baking powder
1 teaspoon baking soda
1/2 teaspoon salt
1 to 1-1/2 Tablespoons cinnamon
1/4 teaspoon nutmeg
Optional ingredients: nuts, strong chicory coffee, baked beans, bacon fat, chewin' tobacco.
Grease and flour the bottom of a 9"x13" pan. Preheat oven to 350 F.
In a large bowl stir together flour and brown sugar until thoroughly blended. With pastry blender, two knives or your fingers, work butter into the mixture until it is the texture of bread crumbs. Set aside 1/2 cup of crumbly mixture.
In a small bowl or measuring cup, add vinegar to milk, stir gently and let stand until sour, 2-3 minutes.
Stir baking soda, baking powder, salt and spices into to crumbly mixture and mix well; add beaten eggs and soured milk to mixture, stirring just until mixed (better will be loose and lumpy). Pour into prepared pan. Sprinkle reserved 1/2 cup of crumbly mixture over the top.
Bake 15-25 minutes or until toothpick inserted comes out clean; cake will spring back when touched lightly. Slice and eat when cooled, if you can wait that long. Enjoy!
Improves with age (if it lasts long enough to age) and is amazing spread with butter. You may just find yourself standing over the pan eating slice after slice until half the cake is gone. Ain't my fault!
As always, feel free to leave a comment.
Chocolate Malted Milk Cake.

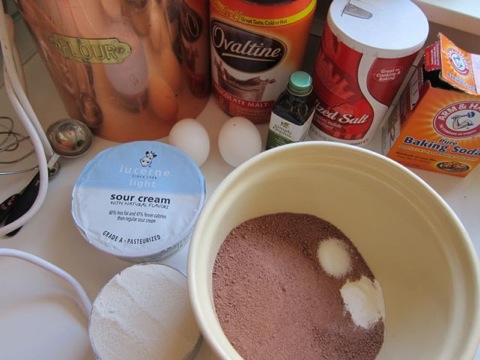
Malted milk is made from malted barley, wheat flour and whole milk, evaporated into a powder form. When you stop gagging, seriously -- it’s quite delicious whipped into a shake. Malted milk is an unusual flavor if you’re used to regular ol’ powdered chocolate milk mix and chocolate milkshakes (nothing wrong with’em). I imagine on some tastebuds that unique malty taste doesn’t blend well with vanilla ice cream and chocolate syrup. I’ve often wondered what that malted flavor really is. If I had to describe it, I wouldn’t know what adjectives to use. “Malt” is a word generally used in conjunction with beer and whiskey. Malted milk, thankfully, does not taste like beer or whiskey.

Malted milk was invented by the English-born Horlick brothers -- William and James -- as a nutritional aid for infants and “invalids.” The Horlicks emigrated from England to Chicago, and ultimately settled in Racine, Wisconsin where they began manufacturing their milk-based product “Diastoid.” Mmmm, can I have a thick, frosty Diastoid shake to go with my burger, please?

Eventually they trademarked the more appetizing and descriptive name “malted milk,” which became popular not only with mothers of infants and teenagers at aptly named malt shops, but also with Arctic explorers, who appreciated the nutritious and non-perishable qualities of the milk powder. Back then it was mixed with water, making it tremendously convenient for Arctic travel.
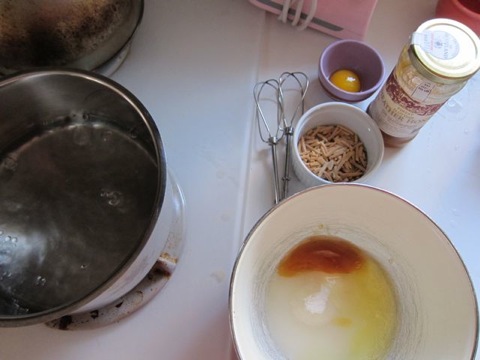
Recently I had malted milk in a truly delicious Chocolate Malted Milk Cake I discovered at Lost Recipes Found. Created by Leona Kroupa of Cedar, Michigan, the cake won a prize at the Pillsbury 5th Grand National Bake Off in 1954 -- and well deserved, too!

Even with 1-1/2 cups of Ovaltine Malted Milk powder, this cake doesn’t taste so much like a chocolate malted as it does like a really REALLY good chocolate cake. It has just a handful of ingredients all mixed together in the same bowl. The only modification I made in the batter was to substitute light sour cream for the full fat version.
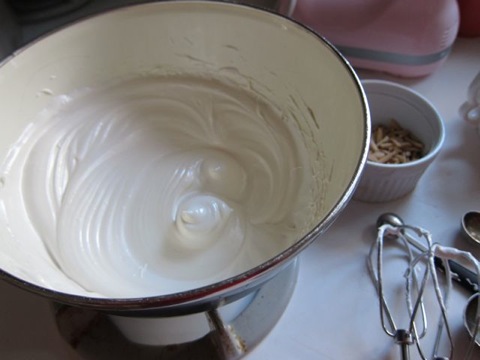
The Honey Nougat Frosting is to absolutely dreamy -- like fluffy honeyed ambrosia made toasty and crunchy with roasted almond slivers. I used only 1 tablespoon of honey (whisky spiked Heather Honey!) instead of 2, and I admit I forgot to add the 1/2 tsp. of vanilla, but it was still one of the tastiest and surprisingly not over-sweet frostings I’ve ever made.
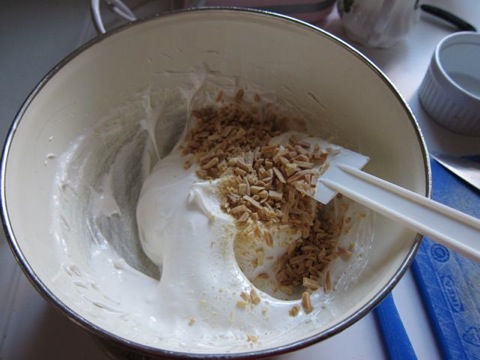
Don’t be intimidated by the double boiler method for making this light marshmallow-like frosting -- it’s easy and so satisfying to watch the ingredients slowly froth up. I mixed the toasted slivered almonds into the frosting, but you could sprinkle them on top as well. Or omit them if you're not a nut lover. The recipe makes a nice manageable 8x8 (or 9x9) cake.
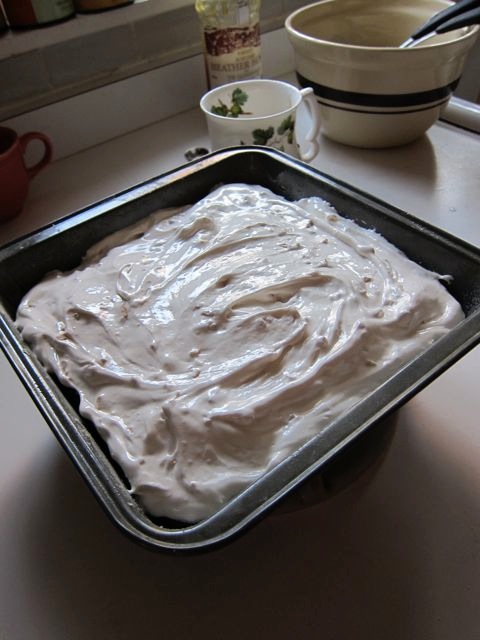
Horlick's malt powder used to be easy to find in stores around here, but no more so I buy regular flavor Carnation and chocolate flavored Ovaltine -- just like Little Orphan Annie. Vermont Country Store carries the Horlick's malted milk tablets, but holymackerelandy! They cost $19 PLUS shipping (which ain't cheap at VCS) for 27 tablets. YIKES. Back in the day we bought jars of those tablets at the drug store, and even if one allows for inflation there's no way they were that expensive.

You'll need glasses of cold milk with this scrumptious chocolatey fluffy-topped cake. And before bed have a mug full of milk mixed with some leftover Ovaltine.

Little Orphan Annie knew what she was talking about!
Want to make this nummy cake? Go here for the recipe.
As always, please feel free to leave a comment.
Irish Brown Soda Bread.
Rye bread will do you good,
Barley bread will do you no harm,
Wheaten bread will sweeten your blood,
Oaten bread will strengthen your arm.
The festive indulgences -- and, one hopes, the ensuing hangovers -- of St. Patrick’s Day are long past as we approach April Fool’s Day. We like to celebrate the day of Ireland’s patron saint at home, away from noisy revelers drunk on too many green beers. Here at O’Smithigans, we enjoyed a simple meal of lamb stew, champ (potatoes mashed with cream, butter, green onions) and scrumptious homemade brown soda bread accompanied by bottles of Guinness and Smithwick’s while celtic tunes jigged their way out of the iHome. Oh, and Irish Coffee Meringues for dessert. Slainte!
Coffee flavored meringues with Irish whiskey-spiked whipped cream. (hiccup)
I used to bring Irish soda bread, Kerry Gold butter, and strawberry jam to work on St. Patrick’s day, in a vain effort to elevate the day above whatever green frosted cupcakes and cookies had also been brought in. My co-workers could not be enlightened and clearly preferred the green stuff. That’s about when I started wondering what St. Patrick’s day is really about. Why it never occurred to me that it’s a religious holiday (a saint’s day!) is possibly because in this country it seems to be largely about the color green: green food, beer, clothing, face paint, rivers, shamrocks and leprechauns.
St. Patrick was an actual guy, born around 387 in Roman Britain -- by some accounts present day Scotland, by others present-day Wales. At 16 he was captured by the Irish and sold into slavery. During his 6-year captivity, while he herded sheep for a Druid, he learned the local Celtic language, essentially converted himself to Christianity, escaped back to his homeland, and returned to Ireland as a bishop who was eventually sainted for Christianizing multitudes of pagan Irishfolk. 
Paddy is credited with using the three leaves of a shamrock to demonstrate the Holy Trinity (that's the father, son, holy spirit for you heathens who escaped St. Patrick's campaign), and the snakes he banished from Ireland are likely a metaphor for the pagan religions he “drove out” as Christianity took root. Although, according to Franklin Habit, a popular knitter and blogger from Chicago, St. P was actually purging novelty yarns from the Emerald Isle.
Christian country though it might be, Ireland is not immune to excessive drink and merrymaking on St. Patrick’s Day, and it sounds like they tried -- and ultimately failed -- to close pubs on March 17. Now they’ve turned the day into an Irish cultural festival in an effort to “bring the piety and the fun together,” so you can have your Jamieson’s and drink it too! The Irish Americans I’ve informally polled over the years celebrate St. Patrick’s Day with a family dinner, often the traditionally American meal of corned beef and cabbage.
St. Patrick’s Day shouldn’t pass without a few hearty slices of brown bread. We occasionally buy McNamees wheaten bread from the Celtic Knot Pub in Evanston. The loaves are tasty, but wee small and quite pricey. I have experimented with several recipes, trying to replicate the McNamees experience, and landed on a "Brown Soda Bread" recipe I’ve had since May 1996, from the special Romance of Ireland issue of Bon Appetit magazine. So that’s 15 years I’ve had the perfect brown bread recipe in my possession and never realized it! 
It’s a quick bread with no fancy ingredients, and cooks up in 40 minutes flat. If you can stand to wait an extra 15 minutes for it to cool, you will be rewarded with a nutty, delicious bread that is not too dense or heavy. It's scrumptious with butter, or mustard, ham and cheese. No more McNamees for us, sorry Celtic Knot. But we’ll still dine there on Tuesday nights to catch your rousing live Celtic Music Seisiuns. 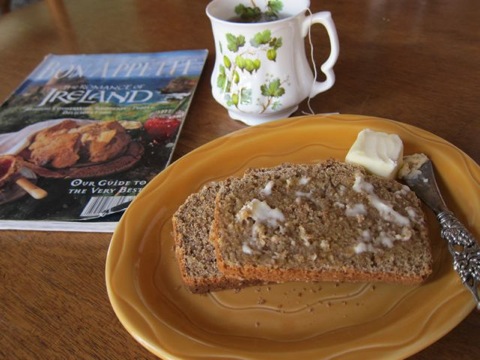 My holy trinity ... brown bread, butter, and hot tea.
Bon Appetit doesn’t have this particular brown bread recipe online, so here is my adaptation of it. I reduced slightly the amount of whole wheat flour and increased the white flour because I dislike how wheat flour weighs things down. Although the bran and wheat germ say "toasted" I didn't actually toast either -- just scooped them directly out of their bags and jars. And do use real buttermilk -- 1 quart (the smallest I can find at local groceries) is enough for two loaves.
Brown Soda Bread
Adapted from Bon Appetit, May 1996
Yield: 1 loaf
2 cups all-purpose flour
1-1/2 cups whole wheat flour
3 Tablespoons toasted wheat bran
3 Tablespoons toasted wheat germ
2 Tablespoons old-fashioned oats
2 Tablespoons (packed) dark brown sugar
1 teaspoon baking soda
1/2 teaspoon salt
2 Tablespoons (1/4 stick) chilled unsalted butter, cut into pieces
2 cups (about) buttermilk
Preheat oven to 425 degrees Fahrenheit. Butter 9x5x3-inch loaf pan. Combine first 8 ingredients in large bowl; mix well. Add butter; rub in with fingertips or pastry blender until mixture resembles fine meal. Stir in enough buttermilk to form a soft sticky dough. Transfer dough to prepared loaf pan. Bake until bread is deep golden brown and tester inserted into center comes out clean, about 40 minutes. Turn bread out onto rack. Turn right side up and cool on rack.
Once cooled, it slices easily and freezes well.
Enjoy! And as always, feel free to leave a comment.
Spiced French Coffee Bread.
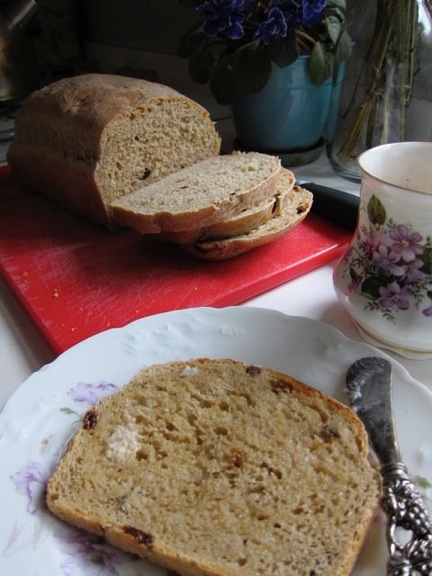 Last weekend’s weather was miserably perfect (cold, rainy, snowy, gloomy) for bread baking. And with a French theme going -- we watched “Amelie” while dining on rustic Tomato Tart (this time with cheddar cheese instead of creme fraiche) -- I pulled Spiced French Coffee Bread from my favorite Old World Breads cookbook.
“This comes from Southern France, specifically the Armagnac District,” quoth Old World Breads. Hmmmm ... Armagnac? as in the brandy? Well, yes, there IS brandy in this bread. “Many of the region’s breads are flavored with it,” continueth the book. At which point I pondered the merits of moving to Armagnac. (‘alo, beautiful!) The amount of brandy is small--just a tablespoon poured over the raisins, and the whole lot is thrown into the dough after 15 minutes. I warmed the brandy/raisin mixture for about 15 seconds in the microwave, to fully soften the raisins.
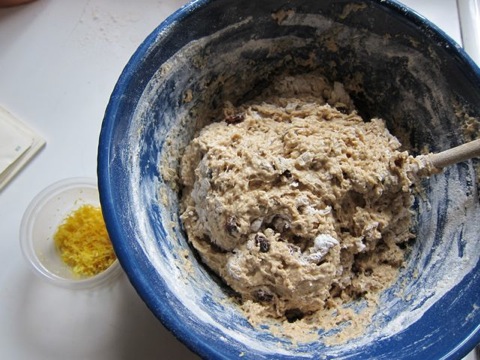 Unlike “coffee cake” which is meant to be enjoyed with a cup of hot coffee or tea, coffee bread actually has strong coffee in it -- decaf, of course. (I’m sure the French would scoff heartily at this.) Also grated lemon rind, the brandy-soaked raisins, and pinches of cinnamon, allspice, ground cloves. The recipe calls for a half cup of chopped nuts, which I contemplated adding. But nuts in bread is a tricky thing -- not everyone’s cuppa. So, no nuts.
 This bread is, in some ways, similar to the scrumptious (if I say so myself) Yorkshire Breakfast Bread I baked a while back. The difference is the coffee, which adds lovely color and subtle depth of flavor. Even with spices, lemon, coffee, raisins and brandy, the flavor is not overly strong or perfumey--the ingredients blend together quietly, although toasting (and smothering in butter) raises the volume deliciously.
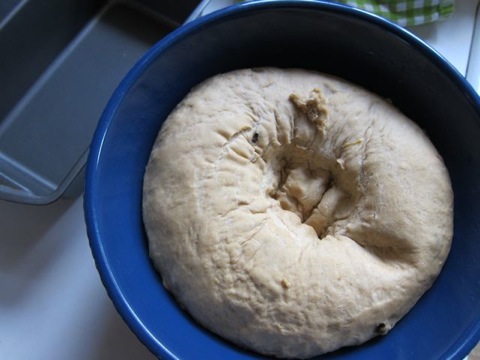 Old World Breads does a great job explaining the basics of breadmaking, although my other favorite bread book -- Bread by Eric Treuille and Ursula Ferrigno -- does it just as well and with pretty photos. If you haven’t tried making bread, both of these books can walk you through it comfortably.
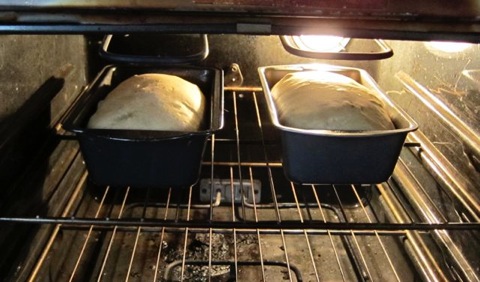 There is nothing like the fragrance of baking bread wafting through your home ... except maybe tucking into a warm slice of that freshly baked bread (don't forget that butter).
 To keep your heavenly loaves from drying out, cool thoroughly, slice, wrap well (I use ziplock freezer bags), and freeze. Then thaw or toast on demand, which I guarantee will be often. Bon apetit!
As always, please feel free to leave a comment.
Victoria Sponge: Treacle and Spice and everything nice.
Sounds like the name of an eccentric English detective, yes? Well, no. It's cake from the motherland. Sometimes I think I was born on the wrong side of pond, so enamored am I of all things British. Well, many things British. I was always fascinated by English accents, the royal family (didn't I dream of marrying one of the princes as a wee girl?), BBC shows on public television -- think Upstairs, Downstairs, double decker buses and London taxis, tea and finger sandwiches, Paddington Bear books. Over the years my fascination branched out from England to Scotland, Wales and Ireland--all of which hold the bones of my ancestors. I feel a kinship with the United Kingdom, and I’m on a quest to strengthen that kinship through--well, a trip there would be nice but until then--food.
Ever since I discovered British Country Living magazine I’ve drooled over lots of interesting recipes from the U.K. And my favorite Miss Read books, about country life in the Cotswolds, have introduced me to a teatime treat called “Victoria sponge.”

No no no, not that kind of sponge! This:
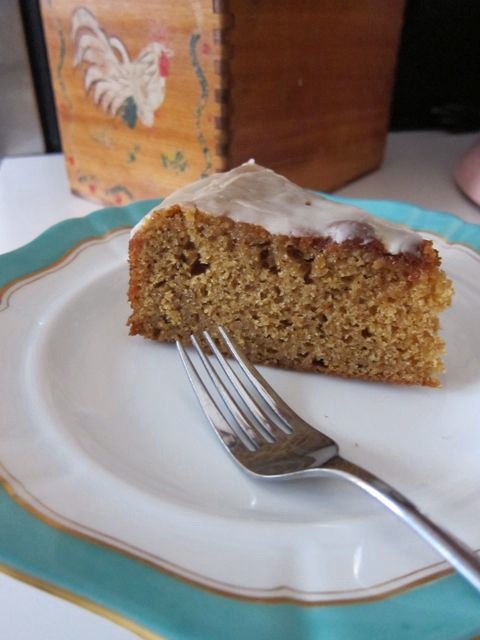
It's Treacle and Spice Victoria Sponge -- darker than the usual Victoria sponges, which look more like this -- yellow cake layers with fruit or jam in between. A slice with a pot of tea, please!

Sponge cakes were, apparently, a favorite of Queen Victoria, who not only invented the entire Victorian era but is also famed for her afternoon tea parties. For elevating the ritual of afternoon tea, credit is often given to the Duchess of Bedford, one of Queen V’s “Ladies of the Bedchamber." Apparently The Duchess got a bit peckish at 5ish, hours after the lunch dishes had been cleared and hours to go until dinner time (at 9:00 p.m.). The story goes that she convinced the household help to sneak pots of tea and snacks into her room, to quell the "sinking feeling" of low blood sugar in between meals. She started inviting friends for this daily repast, and when Queen Vic found out she adopted the ritual herself, enjoying slices of sponge cake with her tea every afternoon.
Back to Victoria sponge (named for guess who?), in which butter and sugar are beaten together until light and fluffy, then mixed with the remaining ingredients. The resulting cake is light, but not so light as angel food cake, which relies on whipped egg whites and cream of tartar to create marshmallow fluffiness and height. Typical Victoria sponge recipes call for equal portions -- usually 225g each (this is a British cake, remember) -- of butter, caster sugar (ground to a fineness between granulated and powdered sugar--here we call it "superfine sugar"), eggs and self-raising flour (flour mixed with baking powder and salt, although my bag also lists baking soda). In fact, one Sponge recipe I found calls for weighing three eggs first, then adding the same weight in butter, sugar and flour. Clever! Like a pound cake.

With all those lovely grams to calculate, this cake calls for your trusty Escali Digital Scale. You say you don’t have one? Go here to buy! You won’t regret it.
This cake is a departure from regular Victoria sponge -- it is flavored with dark muscovado sugar (like molasses flavored dark brown sugar), cinnamon and allspice, only one deep layer, no fruit in the middle, and a sweet orange glaze on top. I couldn’t find muscovado sugar anywhere, so I mixed about a tablespoon or more of molasses with dark brown sugar. Someday I’ll find that muscovado sugar to see how mine measured up. I also made my own self-raising/rising flour: 1.5 tsp. baking powder and 1/4 tsp. salt per cup of flour. Not being familiar with treacle, I'm assuming the muscovado sugar stands in for it in this recipe.
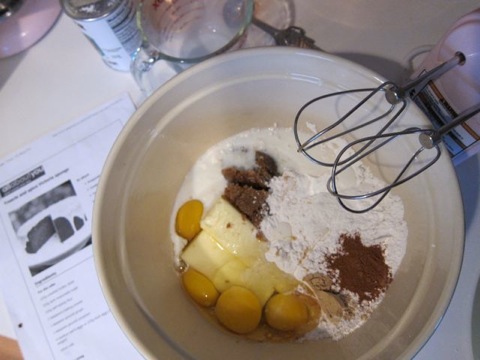
The recipe calls for putting all ingredients into a bowl mixed together, rather than beating the eggs and sugar separately. Oh isn't it nice using just one bowl.
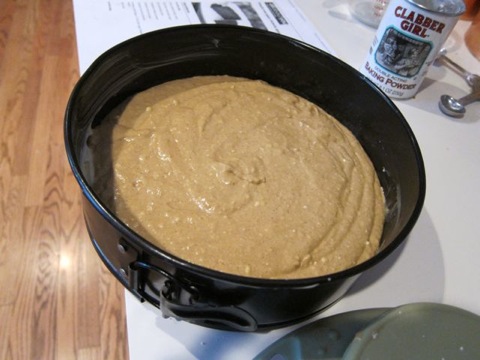
I plopped the batter into a 9-inch springform pan with parchment paper on the bottom.
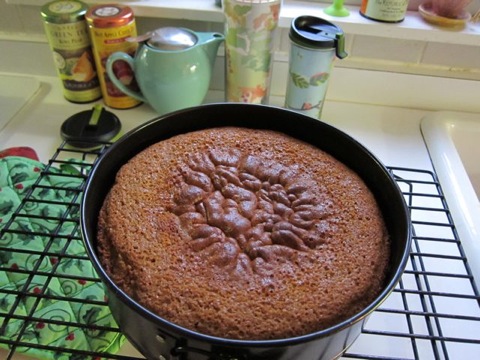
It puffed up nicely with the most interesting bubblynubbly thing happening on top. What beautiful color!

I really worked the orange glaze so it dripped down the sides just as prettily as the picture from the recipe.

The glaze cracked a bit when I transferred the cake from pan to platter, but thankfully this did not affect the flavor. It's moist, not too dense or sweet, and tastes like gingerbread. The glaze is exactly right for it -- just a thin layer of sweetness instead of heavy frosting. When I make this again, I might flavor the glaze with fresh squeezed lemon juice instead of orange, to make it more zingly.
Next time, though, I'm making a chocolate version. I just can't go too long without chocolate.
Pup-kin treats.
There are, however, still a few pumpkin dishes left to write about, including these pumpkin dog treats from Everything Pumpkin. I have made them twice for Piper, our sweet flop-eared Corgi, and she loves them! Or at least, like any normal healthy dog, she employs her "eat now and ask questions later" philosophy of food consumption whenever I offer her one. As yet, she hasn't questioned the worth of ingesting these treats and keeps coming back for more. Frequently. All day, every day.
 Last year's canned pumpkin shortage inspired me to stock up on Trader Joe's organic pumpkin. Now, Trader Joe's can almost do no wrong. However, this canned pumpkin tasted pretty poorly. Bad, even. Downright yucky. So instead of using it for pie (I decided even sugar and cinnamon couldn't save this stuff) into the dog treats it went. Dogs don't know good canned pumpkin from bad, right? By the way, canned pumpkin is actually recommended for treating doggie diarrhea so it's safe for canine consumption.
 Just a few ingredients: pumpkin, water, vegetable oil, cinnamon, oatmeal, and wheat flour. Mix everything into a stiff dough, roll it, and cut out fun shapes. No need for dog bone cookie cutters--any shape will do. Doggie does not care!
  Dogs pretty much don't give a hoot about anything with regard to food except its eatability. They have little regard for the shape, size, flavor, color, texture, temperature, or toxicity of their food. It all goes down the same gullet with such blinding speed one wonders why they even have a tongue. Time to consider such trivialities later, while napping peacefully on the couch and filling the room with the gaseous after-effects of their last meal. Sometimes the smell of food matters, in that the more offensively smelly it is to humans, the more culinary appeal it holds for dogs.
  Ah, but these cookies smell good while they're baking! Everyone in the house asks, "Ooh, what's in the oven?" whenever I'm making up a batch of dog treats. They don't spread at all, so you can squeeze a lot onto a cookie sheet. Once they are baked hard (they do take longer than regular cookies to bake all the way through) and cooled, watch your pup pounce on them.
  Piper loves these spread with a little all-natural peanut butter, to keep her tummy happy between meals (her vet would roll her eyeballs in the direction of Piper's extra heft if she read that). She'd prefer huge slices of cheddar cheese
 I do a decent amount of cooking for the humans in my life, so it's gratifying to make these easy from-scratch treats for my beloved doggie. The recipe yields a lot of treats so they last a good long time, although if Piper had free access to these things they'd be gone in 15 minutes flat. There's something to be said for the devotion of a creature who never questions the quality of your cooking.
Two pumpkin dog treat recipes are here along with lots of other pumpkin recipes, including one for pumpkin latkes that I missed for Hanukkah. Darnit! Next year. Bone appetite!
Feel free to leave a comment!
Chocolate and lazy churros.
I have a weakness for British Country Living magazine. It is a beautiful oversized magazine with articles about actual country living. In the gorgeous British country. My personal dream come true. It has beautiful photos, uninterrupted articles (don't you hate when the last half of an article is buried in the classifieds at the very back of the magazine? I do), interesting recipes (with ingredients like "courgettes"), and the ads don't feel like ads because, well, probably because I'm a naive American who worships (almost) anything from Britain (is it England or Britain?) even their advertising. Ads for companies like Howdens Joinery Co., Quooker Taps, Billington's Sugar, Vale Garden Houses, and the Hampton Court Palace Flower Show beat the stuffing out of ads for those freakishly realistic looking baby dolls. I know that sounds snobbish! And anti-American, which I truly disdain. I love being American, and I'm proud of it. But when I'm reading this lovely magazine ... I'd rather be British.
So I occasionally pick up an issue (someday I'll get an actual subscription
 ... hint hint, Mr. Smith!), especially at Christmas time (which is quickly approaching, Mr. Smith!), when I want to lose myself in Britishness. The absolutely only drawback of this magazine is the recipes are in grams and liters (oops! litres), difficult for a gal who loves to cook and wants to make "Sweet-sour rabbit with chocolate," but who lives in a pounds-and-ounces world. So after I bought my pretty green Escali Primo digital scale
 I quickly started choosing which British recipe I would try first.
Unfortunately, I didn't need my trusty Escali scale for this one, but I did have to consult the "ml" side of my pyrex measuring cup. SO British!

I used a mere quarter inch of canola oil (the recipe calls for olive oil, but I worried that would be too heavy) to fry strips of both white and wheat flour tortillas. They took only about 15-20 seconds to cook on each side, so I couldn't be Facebooking or playing with the dog or watching episodes of "Monarch of the Glen" while I was doing this. It was a pretty quick succession of plop (or place, to avoid splattering hot oil all over my hands), sizzle, flip, sizzle, remove. Repeat until desired number of tortillas have been fried. Truly easy.
Drizzle honey (plain old generic clover honey is fine) and cinnamon sugar, or just a dusting of cinnamon, on the hot fried tortillas. Voila! "Lazy churros."

The "dipping chocolate" is hot chocolate made creamy and flavorful with evaporated milk and thickened with a tablespoon of cornstarch ("slaked in a little water"--how British is that!). I mixed evaporated milk and 2% milk about equally--I love evaporated milk, but hot chocolate made exclusively from evaporated would be too rich even for me. The finished chocolate is really like drinkable pudding that is creamy, thick, and downright luxurious. And reasonably low in fat, for hot chocolate.
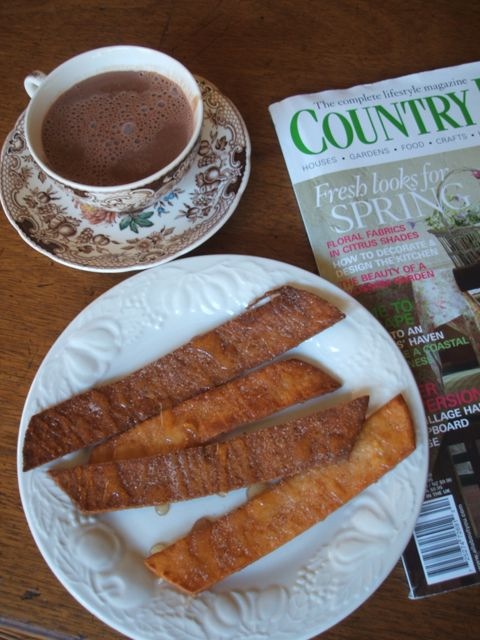
The whole wheat churros were every bit as good as the white flour ones, although the white flour version tasted more like the real thing. The recipe calls for serving them plain but I couldn't resist the drizzle of honey and sprinkle of cinnamon.

The test: does the dipping chocolate coat the churro? Yes it does!

'Nuf said. Do try this on a chilly Autumn weekend. It's pretty fast and easy, and even the frying isn't as messy and oppressive as, say, frying doughnuts in 3 inches of hot oil. Enjoy!
Chocolate and lazy churros
From the April 2010 edition of Country Living, British Edition
Preparation: 5 minutes
Cooking: about 10 minutes
Serves 4
FOR THE DIPPING CHOCOLATE
4 heaped tablespoons good-quality cocoa powder
750 ml whole or evaporated milk
1 level tablespoon cornflour (cornstarch), slaked in a little water
sugar or honey to sweeten
ground cinnamon to decorate
FOR THE CHURROS
4 wheatflour tortillas, chapatis or pitta breads
olive oil for shallow frying
1. In a heavy-bottomed pan over a gentle heat, whisk the cocoa into the milk till it dissolves. Whisk in the cornflour. Bring to the boil, remove from the heat, then sweeten to taste and serve sprinkled with cinnamon.
2. Snip your breads into ribbons, about the width of your thumb. Fry in shallow olive oil until crisp and golden, then transfer to kitchen paper to drain.
Notes: I used half evaporated and half 2% milk for the chocolate. I used white and wheat flour tortillas for the churros and fried them in canola oil.
Feel free to leave a comment!
More pumpkin: Spiced dinner rolls.
It might seem excessive to serve pumpkin rolls with Harvest Pumpkin Salad. But not for me! These "Spiced Dinner Rolls," from the same issue of Victoria Magazine as the pumpkin salad, have a small amount of brown sugar as well as nutmeg and pumpkin pie spice, but they can swing sweet or savory. Savory or sweet. They work just as well sopping up bacon-flavored balsamic vinaigrette as they do smothered in butter and honey. Such versatility is handy in a bread! And pumpkin + bread = two of my favorite food experiences in one. Bonus: I've included the recipe below.

Just 1/4 cup of brown sugar gives these rolls the barest hint of sweetness. And of course there is the requisite canned pumpkin lending its lovely color to the kitchen on a cool autumn afternoon.

I thank the Yeast Goddess (and a sprinkling of sugar) for once again activating my expired yeast!

You'd almost think you were making a spiced pumpkin cake, what with the egg, heavy cream, sugar, nutmeg and flour.

The batter is such a pretty color. But it's very wet, so a good deal of flour must be added to get a workable dough that isn't too sticky.

This lovely orange-hued ball of dough has been kneaded to perfect elasticity and is ready to rise.

The recipe calls for rolling the dough into balls and placing each ball into the individual wells of a muffin tin. I don't have enough muffin tins to accommodate this in one baking, so I tucked about a dozen balls each into two round cake pans. The dough balls rose and puffed into each other nicely, and browned wonderfully in the oven.
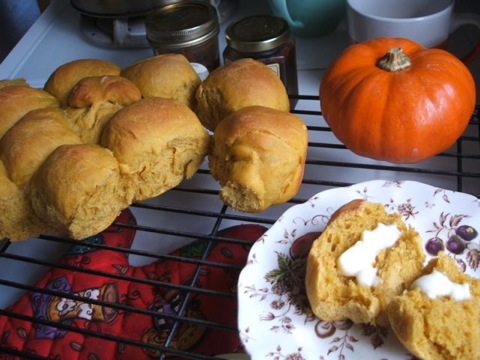
What's the first thing you do with a batch of freshly baked pumpkin rolls? Split one open and let butter melt all over the warm insides! I love butter. Pumpkin + bread + butter = ORGANIC. Oh my. Well, you probably know I meant to type something else, but this is more or less an all-ages blog. (I did use organic pumpkin in this recipe.) After butter, try other toppings like apple butter, or cheddar cheese. But not at the same time. Although, wait ... apples and cheddar go well so I just might have to try them together. Any excuse to dig into those rolls! The "spice" is very subtle--they aren't overly pumpkin-pie-like. A nice complement to an autumnal meal whenever a warm (preferably buttered) roll is called for.

Spiced Dinner Rolls
From the September/October 2008 Victoria Magazine
Makes 24 rolls
1 cup fresh or canned pumpkin puree
2 teaspoons vanilla extract
1/4 cup light brown sugar
3/4 cup warm heavy cream (110 degrees F)
1 package dry active yeast
4 cups bread flour, divided
1/4 cup clarified butter
1-1/2 teaspoons salt
1 teaspoon cider vinegar
1/2 teaspoon pumpkin pie spice
1/4 teaspoon freshly ground nutmeg
1 egg
Walnut Caramel Butter (see Victoriamag.com for recipe)
- In a small bowl, combine the pumpkin puree and vanilla extract; set aside.
- In a large mixing bowl, stir together the brown sugar and warm cream until sugar is dissolved; sprinkle the yeast on top, and let mixture stand for 10 minutes.
- Add 2 cups flour, pumpkin puree mixture, butter, salt, vinegar, pumpkin pie spice, nutmeg, and egg to the yeast mixture.
- Using an electric mixer at medium speed, beat mixture until smooth. Stir in 1-1/2 cups flour to form a sticky dough. Turn the dough out onto a lightly floured surface, and knead until smooth and elastic, adding enough of the remaining flour to prevent the dough from sticking to hands.
- Place the dough in a large lightly greased bowl, and turn to coat. Cover with a clean kitchen towel, and let the dough rise in a warm place, free from drafts, for 1 hour, or until doubled in size.
- Coat 2 (12-cup) muffin tins with cooking spray. Punch down the dough, cut into 24 equal pieces, and shape each piece into a ball. Place each ball into a well of prepared muffin tin. Cover with the kitchen towel, and let rise 30 minutes.
- Preheat oven to 350 degrees F. Uncover dough, and bake for 15 minutes. Cool rolls slightly on wire racks before serving. Serve warm with Walnut Caramel Butter.
Harvest Salad with Bacon Vinaigrette.
See if you can believe this: pumpkin lover though I am, I've cooked with a fresh pumpkin only once in my life: bread-pudding stuffed pumpkin from a Victory Gardens recipe my brother Mark shared with me years ago. Then I managed to lose the recipe and haven't cooked with fresh pumpkin since, although I've used a good deal of the canned kind (thank goodness the canned pumpkin shortage is over!). Until last weekend, that is, when I finally tried "Harvest Salad with Bacon Vinaigrette" from the September/October 2008 issue of Victoria Magazine. (This recipe is not posted at the Victoria mag site, unfortunately.)
I've been drooling over the Harvest Salad recipe for two years: imagine seasoned (and bathed in butter) baked pumpkin slices atop mixed greens then tossed with bacon/balsamic vinaigrette and sprinkled with toasted pecans. Gimme! Grocery stores around here don't generally carry small pie pumpkins (or "sugar" pumpkins) meant for cooking and eating, so when I saw them at a local garden center for $3 each I pounced.
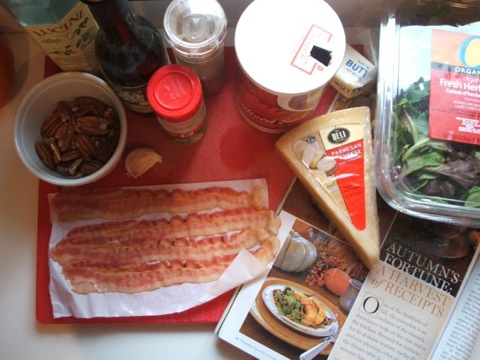
This is the first time I've carved a pumpkin in September, I'm sure of that.

I cut out the top, then sliced the wee thing in half. Oh, that fresh pumpkin smell really brings Halloween closer! I breathed it in for a few minutes, while visions of jack o'lanterns danced in my head. A bonus: these smaller pumpkins are much easier to cut through then thick carving pumpkins.

I considered baking the seeds, but there's plenty of time for that come the end of October. That's another wonderful smell in the house--seasoned pumpkin seeds baking on a cookie sheet. One of my favorite scents of autumn!

Peeling wasn't too bad, but pumpkins certainly have tougher skin than apples or carrots. Our nice sharp vegetable peeler helped (I would not recommend a paring knife for this task), although the skin tended to fly off in big flakes all over the kitchen. It was messy but manageable.

Now butter is melted with salt, pepper and garlic powder, then brushed onto the slices. Anything brushed with melted seasoned butter is, in my cookbook, destined to be delicious! I love butter, especially when it is melting onto something hot like rice, vegetables, pasta or homemade bread. As far as I'm concerned, butter is the elixir of life.
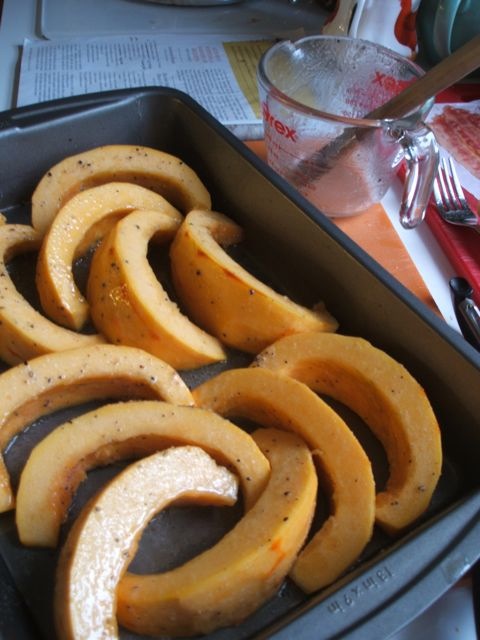
A simple vinaigrette of balsamic vinegar, olive oil (I used our favorite Lucini, one of the few real indulgences in our pantry--don't freak too badly when you see the price, it's worth every penny), chopped garlic, and crumbled crispy bacon is whisked together. In the future I might leave the bacon out of the dressing and instead crumble it over the dressed salad. The recipe also called for liberally dressing the greens in advance with the vinaigrette; I opted toss them with the merest drizzle--just enough to make them glisten and give them some flavor.
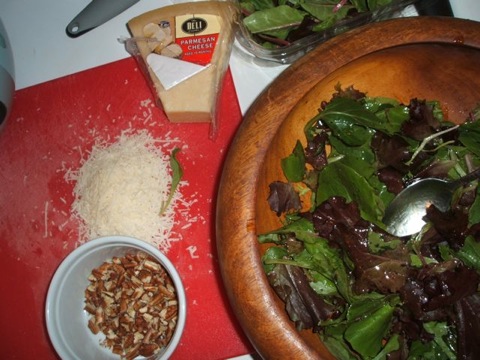
The fully assembled salad, if I humbly say so myself, was extremely tasty! The mix of flavors and textures worked beautifully together: warm, buttery seasoned pumpkin, bright tangy mixed greens, savory-salty bacon vinaigrette, crunchy toasted pecans.
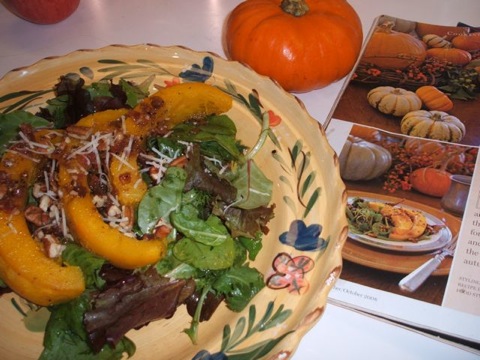
Somehow the lightly dressed greens gave the whole dish a sophistication I don't normally accomplish (or even aim for) at home. We sprinkled parmesan cheese on top, but agreed it didn't really need the cheese. Which is saying a lot because we love sprinkling freshly grated parmesan cheese on just about everything. (We also love slicing it up and snacking on it while we're preparing dinner.)
Kenny gave his enthusiastic approval, too, saying that if we opened a restaurant this should be at the top of the menu. He's a generous and wonderfully willing culinary guinea pig! We probably won't be opening a restaurant, but we'll be eating a lot of pumpkin dishes--including this one--over the next few months.

It was equally tasty as leftovers two days later. And it was a delicious diversion from sweetened pumpkin recipes, although there will be more of those to come in the very near future! Next up, though: Spiced Pumpkin Rolls, also from Victoria Magazine.
Harvest Salad with Bacon Vinaigrette
From the September/October 2008 Victoria Magazine
Makes 6 servings
1 baking pumpkin, peeled, seeded, and cut into 1-1/2-inch-thick slices
1/4 cup melted butter
1-1/2 teaspoons salt, divided
1 teaspoon freshly ground black pepper, divided
1/4 teaspoon garlic powder
1 cup extra-virgin olive oil
1/3 cup balsamic vinegar
8 slices bacon, cooked and crumbled
1 shallot, minced
6 cups salad greens
1/4 cup grated Parmesan cheese
1/4 cup toasted pecans
- Preheat oven to 350 degrees F. Lightly grease a large baking sheet.
- Place the pumpkin slices 1 inch apart on the prepared baking sheet. In a small bowl, whisk together the melted butter, 1/2 teaspoon salt, 1/2 teaspoon pepper, and garlic powder; evenly coat pumpkin slices with the butter mixture. Roast pumpkin for4 20 minutes, or until tender.
- Using a food processor, mix together the oil, vinegar, remaining salt, remaining pepper, bacon, and shallot until well blended.
- In a large bowl, toss the salad greens with 3/4 cup of the vinaigrette. Mound the greens on a serving plate, and top with roasted pumpkin. Drizzle the remaining vinaigrette over the pumpkin, and top with the Parmesan cheese and pecans.
Notes: I flipped the pumpkin slices about halfway through baking. I used precooked bacon, to save time (it toasts up nice and crisp in a toaster oven in about 3 minutes). I drizzled just a small amount of the vinaigrette on the greens, instead of using the 3/4 cup called for.
Chocolate lavender vanilla cookies might cause romance.
Next to roses and holly, lavender is one of the most romantic plants I can think of to have in the garden. I’ve tried several times to bring this romance to my various yards, but sadly the plants always died off. This time around I must have amended the soil with enough sand to recreate the hillsides of Provence, and it is flourishing at last! And another thing? When I’m watering the garden, I pass right over it. I literally ignore this beauty, and it thrives.
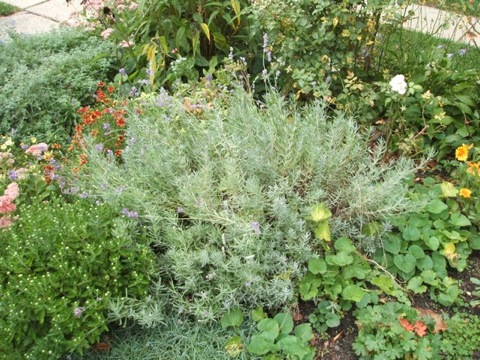 This bushy lavender plant reassures me that I'm at least a half-decent gardener.
Known for its calming therapeutic properties (we have a soft lavender-filled wrap that, after a few minutes in the microwave, does wonders for neck tension and headaches), lavender has historically had a place in the kitchen, too. It adds perfume to sweets, earthy depth to savory dishes, and makes a calming tea--Queen Elizabeth I drank it to soothe her migraines. I’ve long wanted to experiment with recipes calling for lavender buds or syrup, and the May/June 2010 issue of Victoria Magazine--plus my bumper crop of home-grown lavender--inspired me to make “Lavender and Vanilla Bean Cookies.” If smelling, sipping and wrapping oneself in the scent of lavender helps heal and relax, then surely eating the stuff is bound to result in total bliss!

In June my plant was thick with gorgeous purpley stems, which I harvested and dried in lovely fragrant bunches. I disbudded a number of them for the recipe, then discovered that our sweet Miss Molly cat liked to make a mess of what was left in order to nibble the dried stems. I finally had to hide the few remaining bunches on top of the highest bookshelf in the house. Bad kitty.

That's my green Escali Primo digital scale
peeking into the picture. I love that scale! It measures food (and yarn, letters, etc.) in grams or ounces, so now I not only can make recipes from British Country Living magazine (in which all ingredients are measured in grams and liters), but I also can estimate how much yarn I have in a partial ball, how much I've used, how much is left in a ball--especially handy if I'm, say, trying to use exactly half a ball for something. It also lets you place a measuring cup, bowl, pan, or other receptacle on the scale and re-set the weight to zero so you can measure things into the receptacle. It was a worthy investment and I highly recommend it.These are simple, easy-to-make sugar cookies flavored with lavender-vanilla flavored sugar, which you make in advance (but can make and use the same day as you are making the cookies) and a tablespoon of lavender buds.

Just look how pretty that lavender-vanilla sugar mixture is! And it smells heavenly.

I made half the recipe called for (about two cups), used half that in the cookies, and have another cup left ripening in a ball jar.

Stick your nose inside a jar of this sugar and you will swoon! You could also sift out the lavender buds to use the scented sugar in hot tea or other recipes. The flavor is subtle and very appealing.
The sugar cookie dough, which includes two eggs for some added richness, goes together quickly, is chilled until firm, then rolled out.

Those dark blobs are the tiny black vanilla seeds scraped from one of the beans.
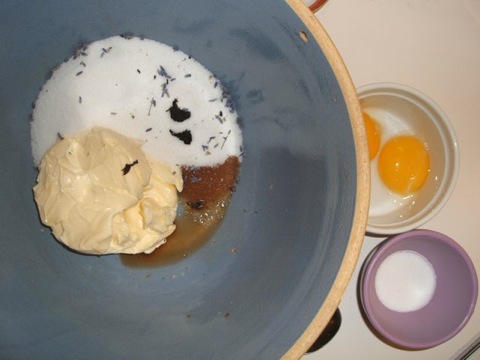
Once again the pink Kitchenaid Cook for the Cure handmixer
 goes to work!
Lavender buds are so pretty to work with.

After rolling and cutting, some of the cookies came out a trifle malformed. Didn't affect the taste one bit! How about that. Don't the lavender buds look pretty in the dough?

You can see the wee flecks of real vanilla bean. I also sprinkled a few of the cookies with turbinado sugar. It was good, but didn't make or break the recipe so I'd leave it off next time.

Cooked cookies chillin' out and awaiting the taste-test.

So, how does lavender taste when baked into cookies? On my palate it imparts a clean, piney flavor which is foiled nicely by the gently flavored sugar cookie dough. It's a new and fascinating taste--not an unpleasant one, though, and not perfumey as one might expect. Everyone in the house liked them (even the kids!), though they were initially hesitant to try them. (Lavender is for soap and candles and potpourri and Method house cleaning spray, not cookies.)
They were tasty, indeed, but I couldn’t be content to leave them plain and decided they needed a dip in some melted dark chocolate. Out came the Trader Joe’s Belgian chocolate bars!

The result was divine. Chocolate, lavender and vanilla in a sugar cookie is an elegant, even sexy combination--light, rich and fragrant all at once. I think you could seduce someone with one or two of these treats. After all, lavender is known as, well, a mood enhancer especially for men, according to a study by the Smell & Taste Treatment and Research Foundation. (So is pumpkin which, lucky me, Kenny likes as much as I do ...). In fact, they are so delicious with the chocolate it’s difficult for me to eat only one (or two) of these cookies. And the crisper, more golden cookies were the absolute best ones--next time I will carefully brown as many as possible.
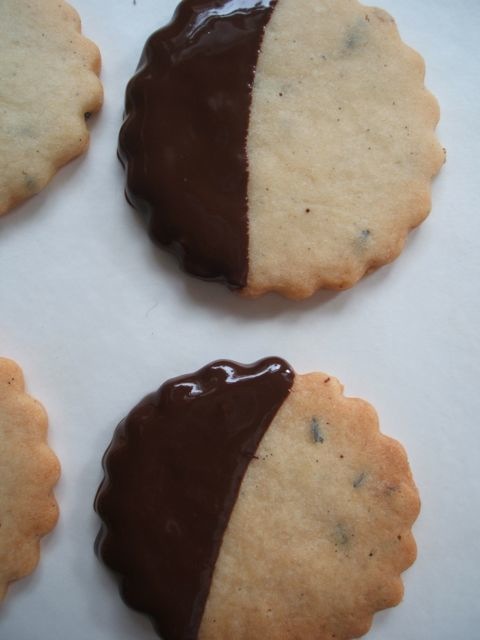
Not surprisingly, a plate of Chocolate Lavender Vanilla Bean Sugar Cookies goes perfectly with a pot of hot tea--Republic of Tea Kiwi Pear Green is almost always my choice but any of the typical English/Irish/Scottish black teas would do well.

I also cooked up some Lavender Simple Syrup from the same issue of Victoria Magazine, hoping to make a pitcher of refreshing Lavender Lemonade. Well, notwithstanding my suspicions that the proportions in the recipe were incorrect (or it could be that I'm just no good at making this concoction), the simple syrup was not my cup of tea. It ended up too cloying, perfumey and sweet, even when tempered with water, ice and lemons. I poured it down the drain. Lavender buds in cookies are lovely; lavender buds simmered with sugar and water are not.
 Looks nice enough, yes? But I shudder even at the memory of it. Too sickly-perfume-sweet, in my humble opinion.
 Ah well, perhaps my culinary adventures with lavender will be limited to scrumptious, seductive Chocolate Lavender Vanilla Bean Sugar Cookies. I can't exactly guarantee they will improve your love life (or mine) ... but it can't hurt to give them a try. Um, is it getting warm in here, or ... ?
Yorkshire Breakfast Bread.
Bread is like dresses, hats and shoes—in other words, essential!
~~Emily Post
As soon as September--the unofficial end of summer (one of the wretchedly hottest on record)--arrives, my thoughts turn to food, and baking, and specifically bread baking. It doesn’t need to be freezing winter for me to want to knead a bowl full of dough into some golden loaves. Just a few days with lows in the 60s (Mother Nature has obliged us generously so far this month) whets my appetite for slabs of warm homemade bread with butter.

A New York Times recipe for Brown Bread with Buckwheat and Seaweed almost inspired me to try something different, but after some thought even my adventurous palate couldn't get excited about seaweed slivers in bread. So I flipped through my collection of bread recipes until I rediscovered Old World Breads
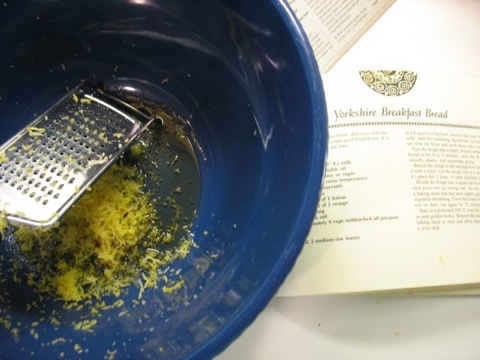
My eye caught the description for Yorkshire Breakfast Bread: “ ... a rich breakfast bread, delicious with butter, marmalade, and some good English tea.” I happened to have just enough currants, golden raisins, and exactly three egg yolks (leftover from the egg whites I used for S’mores Cupcakes frosting), lots of marmalade, and plenty of English tea! I only had to dash out for a lemon and orange and I was ready go. (For the record, I always have plenty of flour on hand and a jar of yeast in the fridge.)
Making bread can be intimidating, and I suppose a bit mysterious in the beginning, but really anyone can learn the mechanics of it: just follow your recipe, then use a little elbow grease to knead the dough, plop it into pans, let it rise, bake, slice, slather with butter, eat. Repeat last three steps as necessary. 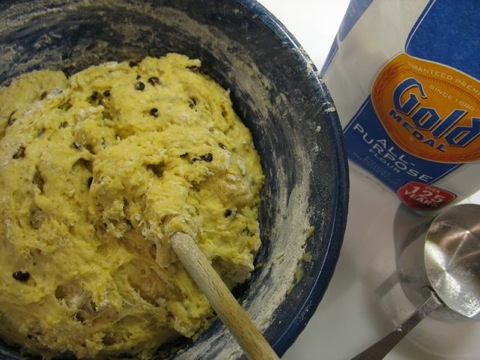
With time and practice it becomes a little more soulful. You begin to understand the chemistry of yeast, sugar and warm milk, know when the yeast/flour mixture is the right consistency for turning onto a counter for kneading, and develop patience for the sometimes monotonous (but really quite sensual) business of pushing and folding the dough over and over and over and over itself to make a smooth, elastic ball that is ready to rise. The sensual aspects of bread are many -- the feel of the dough in your hands as you prime it for rising, the earthy yeasty smell of it before it's cooked, the creamy-smooth surface of the loaves before they go into the oven, and best of all the fragrance that fills your kitchen while they bake. The very idea that you've created one of humankind's staple foods is also truly gratifying.  The dough rose so nicely, I almost didn't want to punch it flat again. But punching it down is the funnest part!
I recklessly used dry yeast that, according to the stamp on the jar, was well past its expiration date. But a sprinkling of sugar activated the yeast and the dough obligingly rose up high! No matter how many times I make bread, it's still a satisfying victory when the yeast does its job. 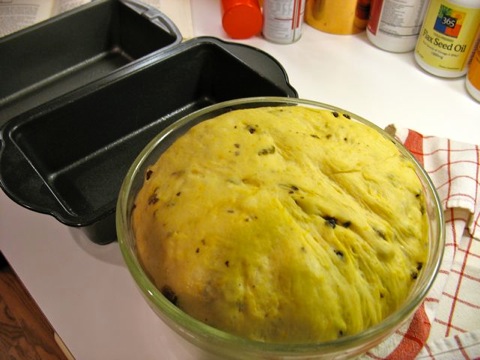 Such pretty, puffy dough! Okay, enough gawking--time to go into those pans for one more rising, then into the oven.
As these lovely loaves baked, the delicious, appetizing, enticing, mouthwatering, heavenly fragrance of lemon and orange filled the house, just like Christmas. I would have given myself a blue ribbon for these beauties.
Gorgeous! If I humbly (and proudly) say so myself. This dough behaved well from start to finish--the loaves rose perfectly in the bowl and pans, and then just a bit more in the oven. They sounded suitably hollow when knocked, a sure sign they are done. Oh yes, time to cool and slice. And eat.
And Yorkshire Breakfast Bread is, as promised in the book, delicious toasted with butter, marmalade and tea. And I'm certain would go quite well with a typical Yorkshire breakfast.
If thou tastest a crust of bread, thou tastest all the stars and all the heavens.
~~Robert Browning
This stuff is heavenly, indeed.
Orange (and chocolate) you glad for s'mores?
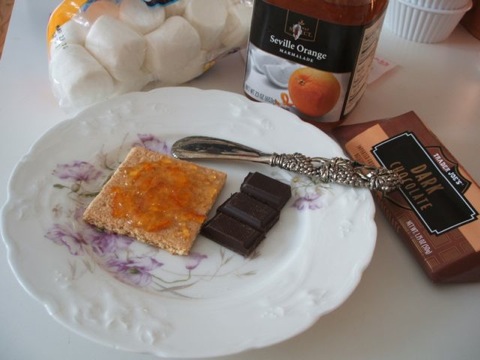
Orange marmalade is formidable stuff, with shavings of tart--sometimes even bitter--orange peel mixed throughout sweet orange flavored jelly. It's easy to understand why some people wrinkle their noses at it. I grew up with and acquired a taste for orange marmalade, and yes sometimes even paired it with peanut butter! Only when I was desperate for a pbj--it's not very good with peanut butter (and even less appealing with peanut butter on heavy-duty Brownberry Bread), but it's tasty on really good toasted (buttered) bread, and goes well with cream cheese too. I like it because of its sweet-bitter-orangey-ness. And because I'm the only one at home who eats it, I know will last indefinitely.

Unless I keep making these. Whoever thought to combine orange with chocolate was a genius! And whoever thought of throwing in graham crackers and gooey toasted marshmallow was, well ...

This one definitely calls for dark chocolate, because orange goes best with dark (I used one of Trader Joe's darks). I recommend you don't char the marshmallow if you use marmalade--soft and toasty will complement the other bold flavors in this fancy sandwich.

Don't forget the cold glass of milk!
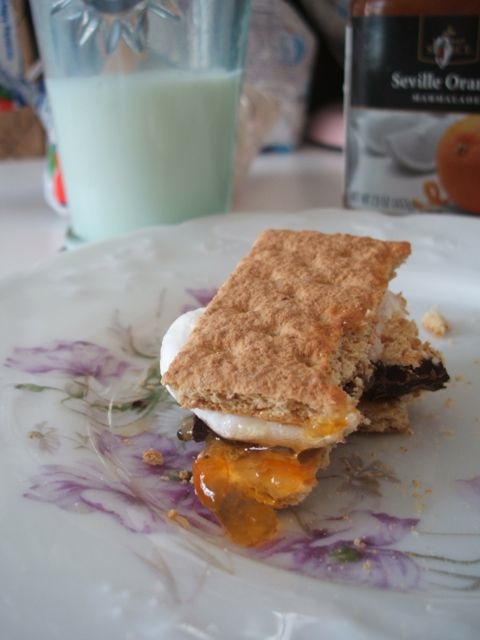
These adventures in campfire snacking have spoiled me a bit -- the traditional s’more might not be quite enough for me from now on.

What say you -- have you tried anything new on your s'mores lately?
Some more s'mores.
The classic s’more is snack perfection: gooey toasty marshmallows, melting-but-not-quite-melted Hershey’s milk chocolate (for me the chocolate still has to have some solid toothiness to it), and crispy graham crackers, all in the same messy, crumbly bite. It almost can’t be improved upon. Almost. Yet several years ago a Country Living article showed s’mores oozing over with marshmallow, melting chocolate ... and gorgeous purpley blackberry jam! I was intrigued. I am a (certain kinds of) fruit-and-chocolate kind of gal, so my mind and tastebuds were wide open for trying this.
 For the first time in my life I had all the ingredients for ANYthing in the house at the same time. Miraculous!
As I pulled together ingredients, I spied the peanut butter and decided to do a side-by-side comparison of peanut butter and blackberry jam s’mores.
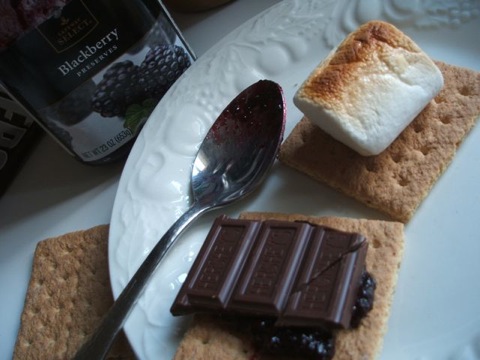 No need to get too fancy. Safeway brand blackberry preserves did just fine for me.
As a peanut-butter-and-chocolate lover (although give me Peanut Butter M&Ms over Reese’s cups any day), I thought I’d go absolutely mad for the peanut butter version.

It was good, really good, but I took just one bite and saved the rest for my son, who proceeded to make several more of the same spread with a thick layer of peanut butter.

The blackberry s’mores, on the other hand, made me positively swoon! Even this store-brand blackberry jam has a depth of flavor that complemented the chocolate elegantly.
 A rapidly dwindling blackberry s'more with the requisite cold glass of milk.
Blackberry-and-chocolate is my new favorite fruit/chocolate combination, easily surpassing strawberries and chocolate. I’m imagining these made with dark chocolate next time. (I just happen to have a supply of Trader Joe's Belgian dark chocolate, and still have plenty of marshmallows and grahams.)
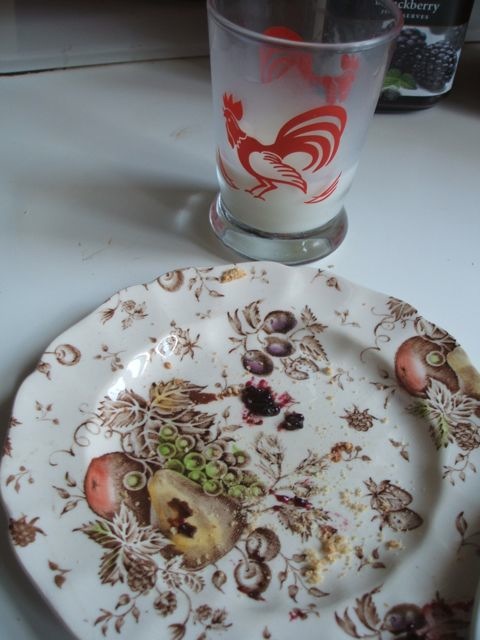 This one disappeared quickly!
Let me know if you try these flavored s'mores or come up with your own concoction. Or do you think the classic s'more is too pure to be tampered with?
Stay tuned for another s'mores pairing, this time dark chocolate and ...
To be continued!
Nectarine pie.
Nectarines are the fruit I look forward to each summer, more than cherries, watermelon or plums. Perfectly ripe, slightly toothsome (al dente?), juicy nectarines are like ambrosia to me. Nectarines are basically naked peaches -- they're genetically equivalent, minus the fuzz. Although I always loved ripe juicy peaches, the fuzz gave me the willies. And without fuzz nectarines can show off their pretty peachy rose complexions.
 No fuzz on these beauties!
When the price drops to $.99 a pound (if they’re cheaper at your grocery story, farmer's market or fruit stand, I will envy you) I know they’re at their peak and buy them by the sackload. That’s when I pull out my tattered, yellowed nectarine pie recipe.
 It looks almost like an antique now.
My copy was cut from the Chicago Tribune’s food section some years ago. It is aged and speckled with the flotsam of pie preparation from days gone by, but is still readable for that once-a-year time when nectarines go one sale and I make my annual pie. (Although last September, after nectarines peaked, I must have made an exception to my on-sale policy so I could make this gorgeous nectarine sorbet.) The Trib site doesn't seem to have the recipe, but Cooks.com has the exact same one.
Usually I’m content to use the Pillsbury pre-made pie crust, which I have found to be both tasty and flaky -- and a big time-saver. I’ve been cheating with it using it for years as a shortcut in the pie making process. This year I was inspired to make my own, which is actually quite easy.
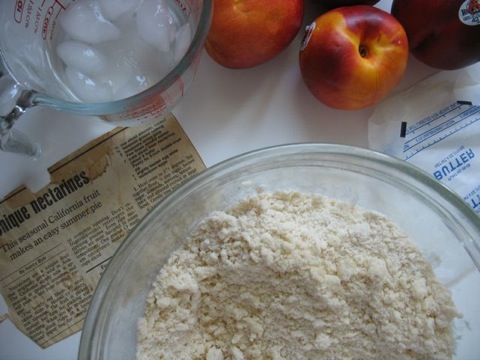
I always feel like a farm wife when I’m working the pastry blender into a bowl full of flour and butter, then rolling chilled circles of dough into thin drapey crusts.

This year the crust had a nice, rustic, cobbled-together look!
The recipe calls for toasted almonds, almond extract and nutmeg, along with flour, sugars and lemon juice. I've learned over the years that nutmeg is not a favorite flavor of the kiddies (at least mine, anyway), so in deference to them (I want everyone to enjoy this pie) I leave out the nutmeg. I've also learned that children don't have the same appreciation as I do for a variety of textures in food, such as the contrast between soft, juicy-sweet nectarines and crunchy, toasted almond slivers. So, alas, I've been leaving out the almonds as well. But they are an excellent and tasty addition to the pie, so if your family will eat them, put them in. And please do leave out the almond extract! I've never used it in this pie and I have to believe the true taste of the nectarines shines through, instead of an artificial taste of almonds.
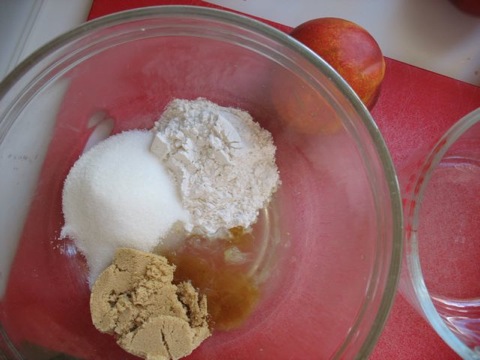 No almonds or nutmeg this year. And never any almond extract.
 Flour helps thicken the pretty rose-colored juices nicely while the pie cooks.
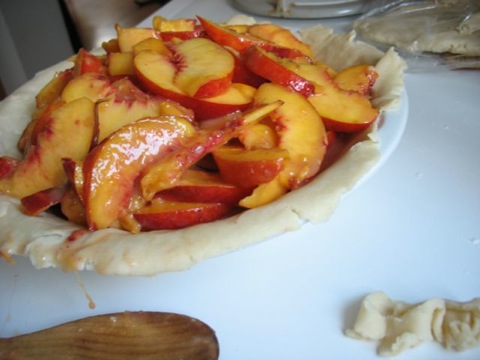 Mound that fruit high in the crust.
I used a small bumblebee cookie cutter to make shapes with the excess crust. Some egg white and water brushed on the top -- along with a sprinkling of sugar -- glaze, brown and sweeten the crust while baking.
 Ready for the oven! Bzzzzzz.....
Looks like the crust wasn't tightly sealed before baking and it split open. Do you think anyone will mind?
It's heavenly served warm, with a scoop of vanilla ice cream.
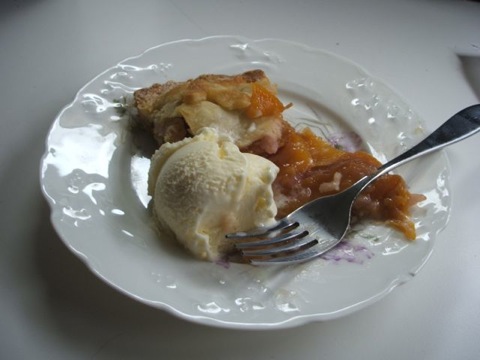
But no one will blame you for having cold nectarine pie for breakfast or a snack!
I recently discovered I'm not the only one who adores nectarines. Check out Nectarine Scene for all kinds of information on this luscious fruit, including knockout recipes like the white nectarine pavlova recently featured. Oh I'm drooling! I'm making that next.
S'mores Cupcakes.
 This was my vision!
I envisioned a graham crackery cupcake spread with a layer of chocolate ganache and crowned by marshmallow frosting. I'd never seen a recipe for graham cracker cake before. I Googled.

Which is when I discovered that, indeed, I had not invented the S’mores Cupcake. But while I found a number of nice sounding recipes, I didn’t find my S’mores Cupcake -- with a simple graham cracker cupcake base and the chocolate ganache layer. Many of the recipes sounded too fussy, with chocolate chips (too provincial) and mini marshmallows (too sticky!) or frostings with a dozen ingredients (too MUCH). So I pulled together several recipes and DID, sort of, invent my own version of this s’moresy confection.
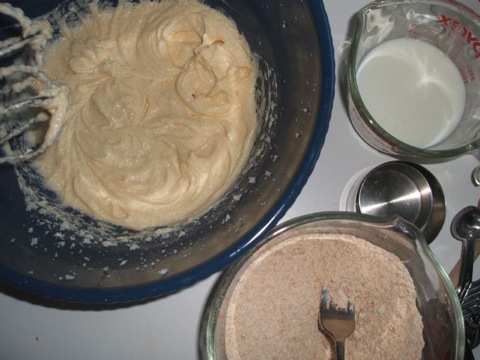
I found a nice Graham Cracker Cupcakes recipe at the Gigi Cakes blog, who used the original recipe from Nabisco. If you've got one, use a food processor -- or better, a mini chopper -- to make grinding up the graham crackers easy and a little less messy. I don't know about anyone else, but I'm not a fan of graham crumbs flying hither and yon all over the kitchen.
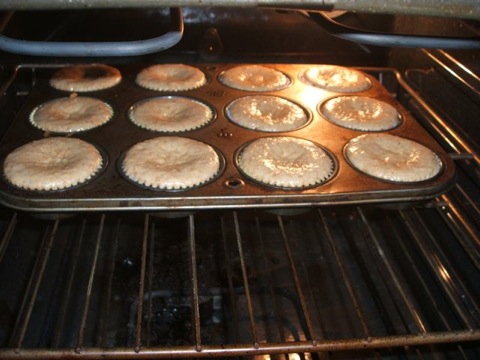
These cupcakes don’t puff up like regular cake, so you can fill the paper liners 3/4 full. They rise but cook flat, all the better for spreading chocolate ganache on top! I refrigerated the plain cupcakes overnight, partly to break up the preparation process and partly to keep the ganache layer and marshmallow frosting from melting on warm, freshly baked cakes. I’m confident these would freeze nicely too, tucked into a ziploc bag. And they are perfectly delicious unadorned accompanied by coffee or tea. Next up: the ganache!
Chocolate Ganache Recipe
3 oz. sweetened dark chocolate (I used Trader Joe’s)
1/8 cup whipping cream or evaporated milk
Put both ingredients into a heavy bottomed pan over low heat.
When chocolate starts to melt, stir ingredients together until chocolate
is fully melted and incorporated with the cream or evaporated milk.
Remove from heat and allow to cool slightly.
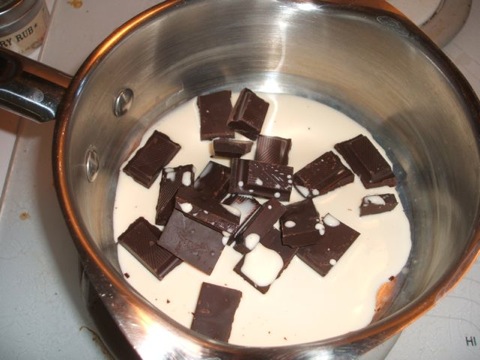
I spread about two teaspoons (but feel free to use more) of chocolate ganache on top of each cupcake and let it set for a few minutes. The recipe above should top 16 cupcakes with some leftover for dipping your finger into.

While there are plenty of marshmallow frosting recipes, including some that use marshmallow fluff as an ingredient (plus additional sugar and/or corn syrup -- yikes, that's got to be sweet!), Martha Stewart’s Marshmallow Frosting (technically belonging to Trophy Cupcakes in Seattle) has only four ingredients and is super easy to make.
 Frosting prep action shot. Note the pink Cook for the Cure Komen Foundation handmixer, in honor of my sister Mary Jane.
I halved Martha's frosting recipe, and quartered the vanilla extract. It tasted perfect! Just the right marshmallow flavor, spreadable, and not too sticky. And even at half the amount there was plenty of frosting for 16 cupcakes, with lots left over.
 Look at those perfect peaks! It only took about five minutes to whip up this frosting.
I used a small plastic spatula to spread and shape the frosting, instead of a pastry bag. Even if you want a fancy, fluted tower of frosting, as shown on Martha’s site, half the recipe should still be enough. I refrigerated the leftover frosting in a plastic container, and a week later it’s still holding up well in the fridge. It will make for great peanut butter and fluff sandwiches! Oh boy, yum.

Once the wee cakes were ganached and marshmallow frosted, I broiled them for exactly a minute -- just enough to brown the tops without burning them. I kept them in the cupcake pan to make sliding them in and out of the oven easier. And I kept a watchful eye on them! I tested one cupcake first, to gauge the broiling time and temperature.
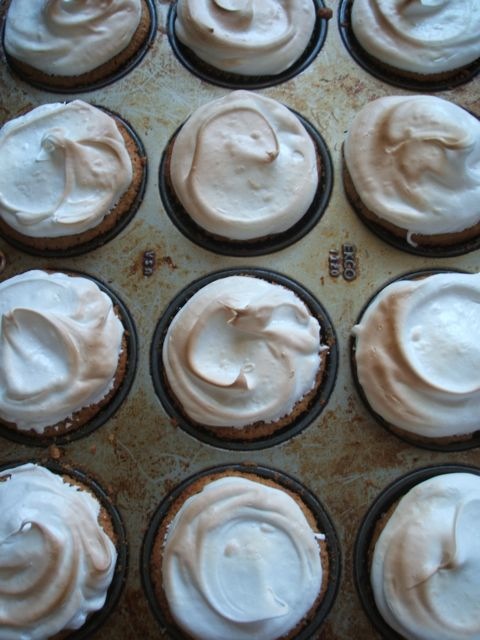
Broiling took place in my electric oven, which I’m not terribly fond of. I grew up cooking with real flames, on the stove top and in the oven. This oven is small and narrow -- it just barely held the turkey we cooked for 15 people a few years back, and cookie sheets have to be shimmied in and out. Plus, we have to set the temperature high by at least 20-25 degrees to get anything to cook within the suggested time on the recipe. One of the few positives about this odd oven is that broiling takes place on the top rack and with the door open, so monitoring food under the broiler is much easier than with a gas oven whose broiler is at floor level. Anyway, watch these pretties carefully when you’re broiling the tops. Just a minute or so should do (and maybe less under a real flame). Or if you’re truly fancy, use a creme brulee torch
 !
! Oh my, look at those lovely cupcakes. They turned out quite nicely, if I say so myself.
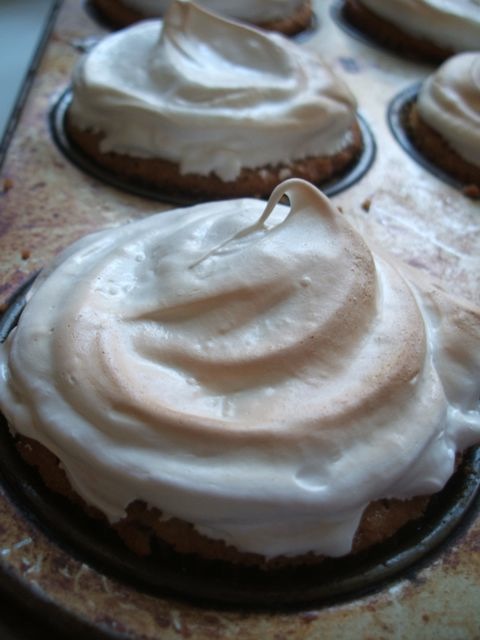
But of course, the true test is the taste.
 Come to me, o vision come true!
Mmmmmmmmmm, they are delish. If I humbly say so myself. A perfect combination of graham, chocolate, and marshmallow.
 Careful--it takes only a few seconds to eat one of these things.
They refrigerate well in a plastic container and the frosting stays put. When you’re ready to eat, leave them out at room temperature for a few minutes and dig in. Or, skip the waiting and just dig in!
A sort of Ambrosia.

The peanut caramel comes together pretty easily, although mine didn’t set quite thick enough so I cooked it a second time for a wee bit -- that caramelized it just enough to let me make manageable blobs for plopping onto chocolate filled paper cups, which I found in the cooking aisle at Tom Thumb.
David’s method of putting melted chocolate into the cup and then “painting” it up the sides was a bit too painstaking for me. After a few attempts, I decided instead to pour a thin-ish layer of chocolate into the bottom of each cup, cool the cups for about ten minutes, put a blob of cooled peanut-caramel on top of the hardened chocolate, then pour more chocolate around the sides and enough to cover the top. This felt more efficient for this short-cut-loving girl. It’s not that I’m entirely impatient or unwilling to put time and effort into producing good food, but when something starts to feel tedious I absolutely must figure out an alternative. This one worked beautifully.
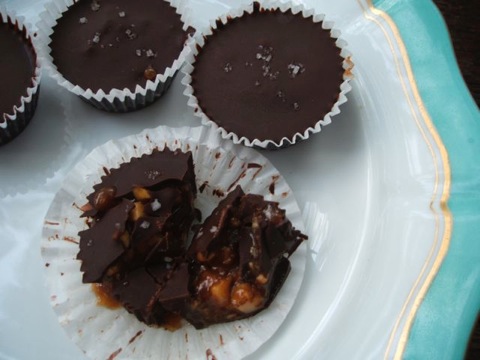
A few sprinkles of fleur-de-sel, a chill in the fridge, and these pretty candies were ready for the real taste test (all the tasting I did during the manufacturing process didn’t really count). Oh my, they were delicious! The tang of salt combined with luscious dark chocolate and creamy peanut caramel -- it's a compelling combination! (Read: dangerously difficult to stop eating.)

Oh goodness yes, I will be making these again!


